Introduction
I usually use API testing tools like Postman and Apifox to test web services, which makes it convenient to debug interfaces. Dynamics 365 also provides many standard interfaces.
Today, I will try to connect to Dynamics 365 using Apifox and attempt to use the standard interfaces.
Prerequisites:
- You are an “Administrator” user, otherwise you cannot access the Azure Active Directory portal.
- Have API testing tools installed, such as Postman, Apifox, etc.
Detailed Steps
1. Get ClientId and ClientSecret
Step 1. Register an Application
(1) Visit and log in to the Azure Portal.
- International version: Azure Portal
- China version: Azure Portal
(2) In the search box at the top, search for “App registrations” and click on it.

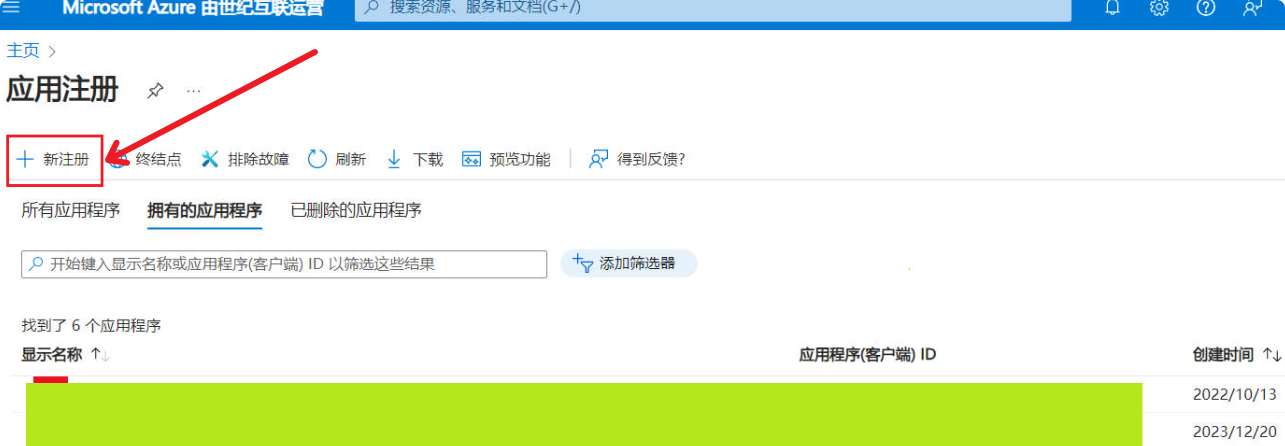
(3) Click on “New registration.”
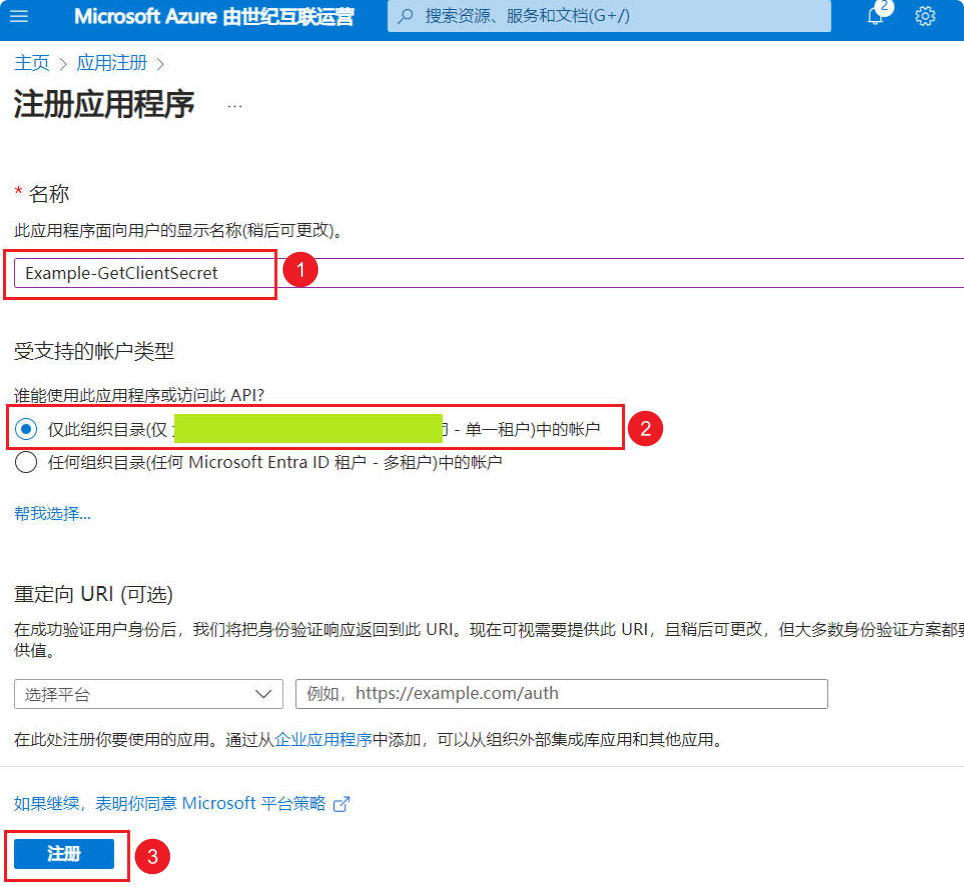
(4) On the pop-up page, enter a meaningful application name (e.g., D365-GetClientSecret) -> Select supported account types -> Click the “Register” button.
Step 2. Get ClientId
Tip
ClientSecret is a password-like key that can effectively prevent unauthorized access. Compared to using usernames and passwords, ClientSecret can provide a more secure authentication method, reducing the risk of data leakage.
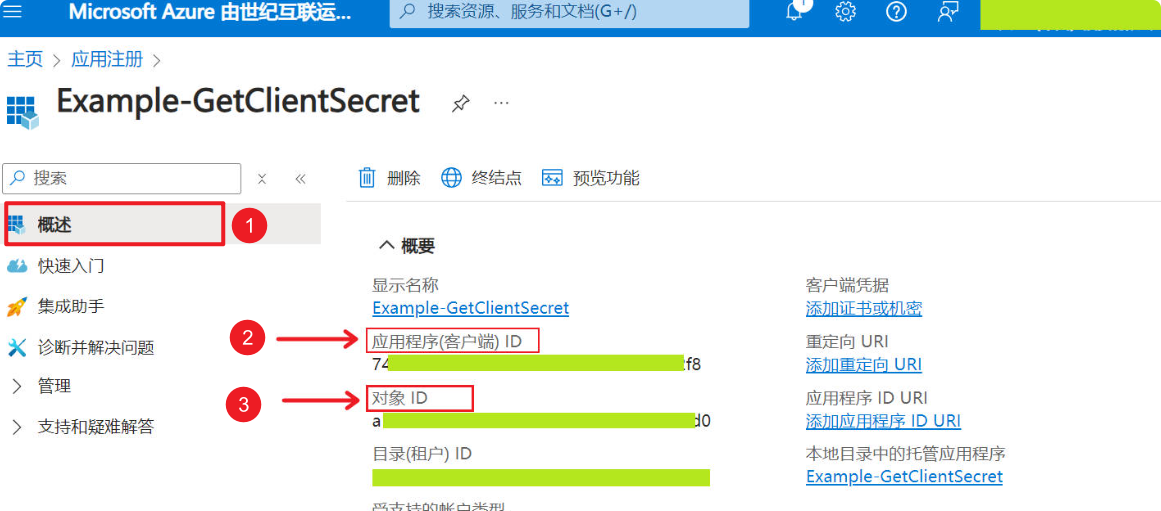
After completing Step 1, we can find the Application ID (ClientId) from the “Overview” section and copy it to Notepad for later use.
2. Configure Application for ①Authentication, ②Manifest, ③API Permissions
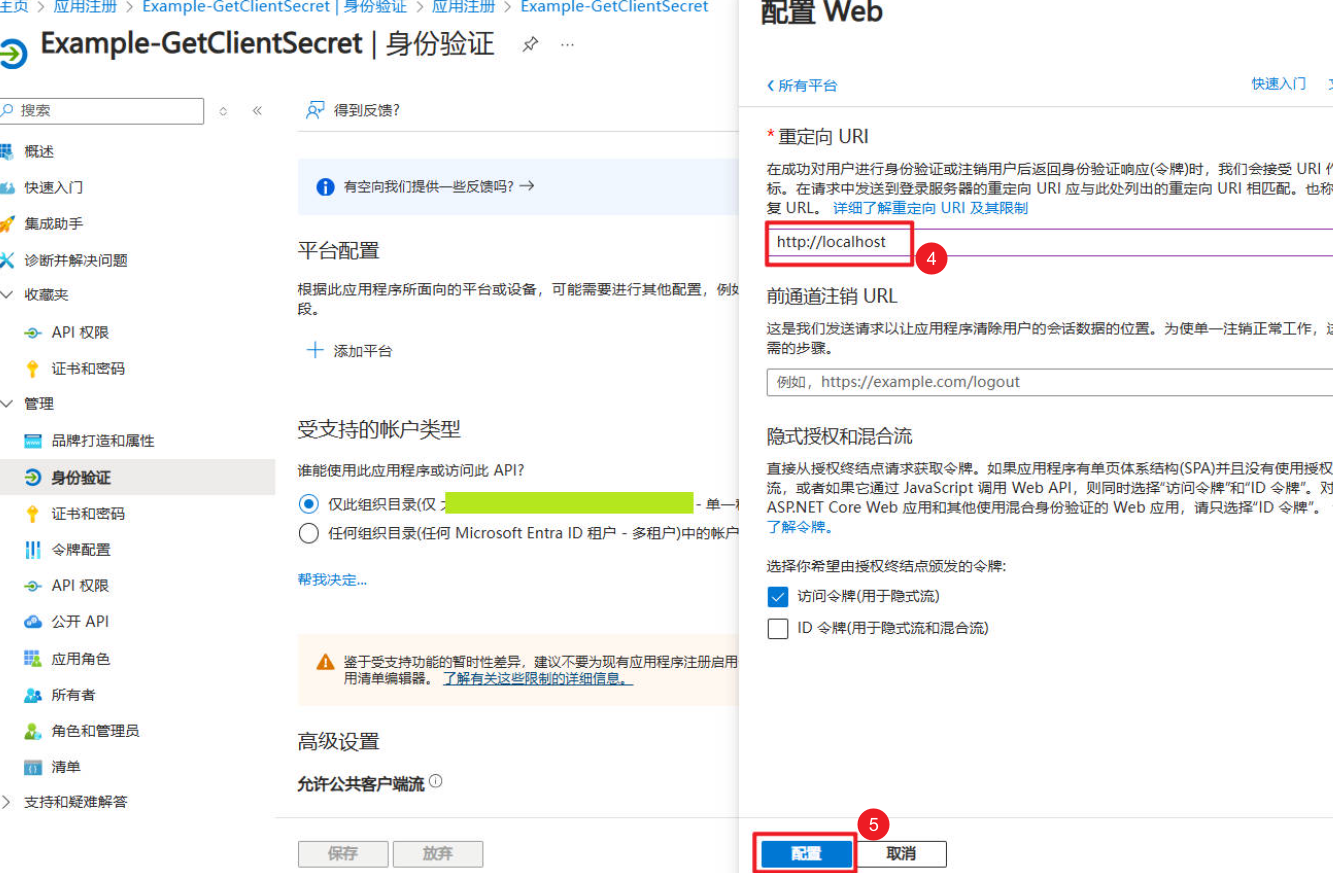
Step 1. Add Authentication
Authentication -> “+ Add a platform” -> Select Web
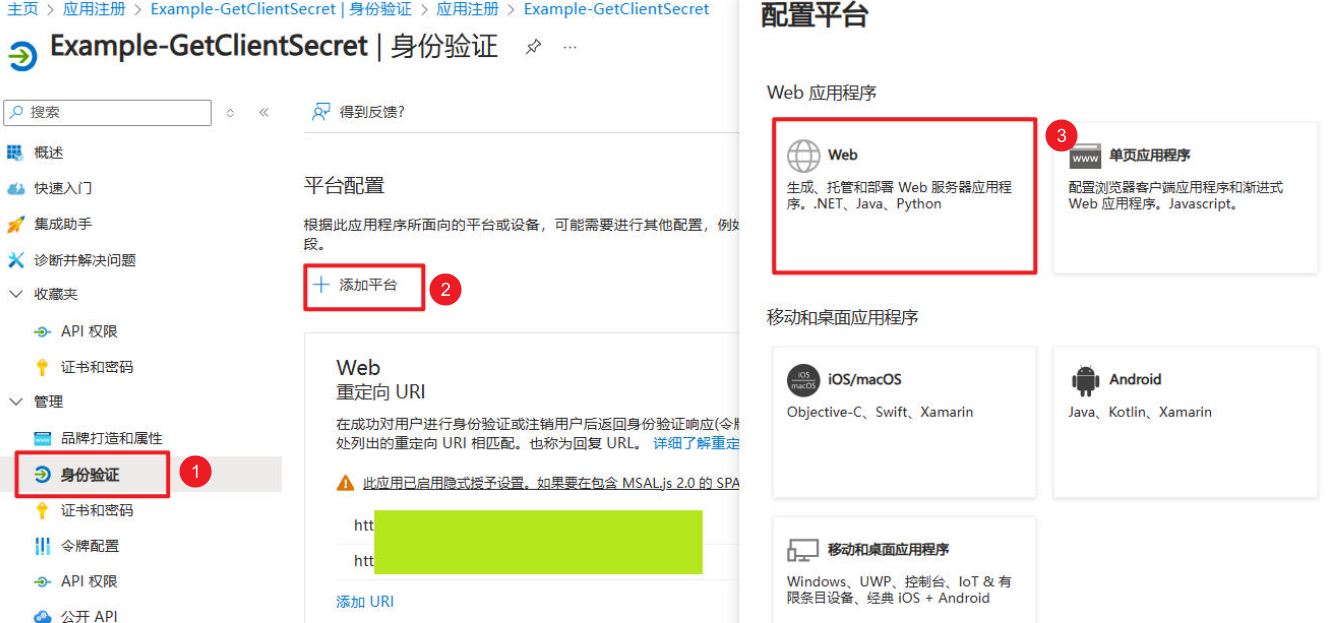
Enter http://localhost -> Check “Access tokens (used for implicit flow)”
Step 2. Modify “Manifest” Configuration File
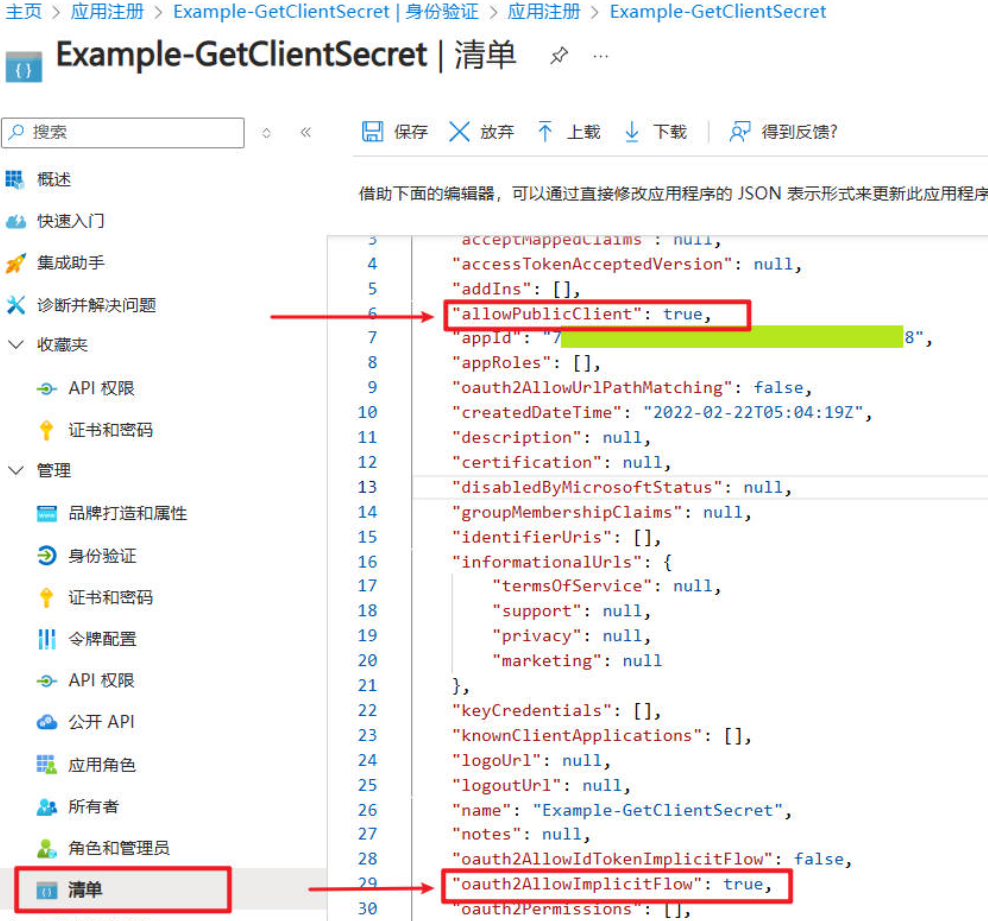
Set the following 2 properties to true and save.
AllowPublicClientoauth2AllowImplicitFlow
Step 3. Add API Permissions
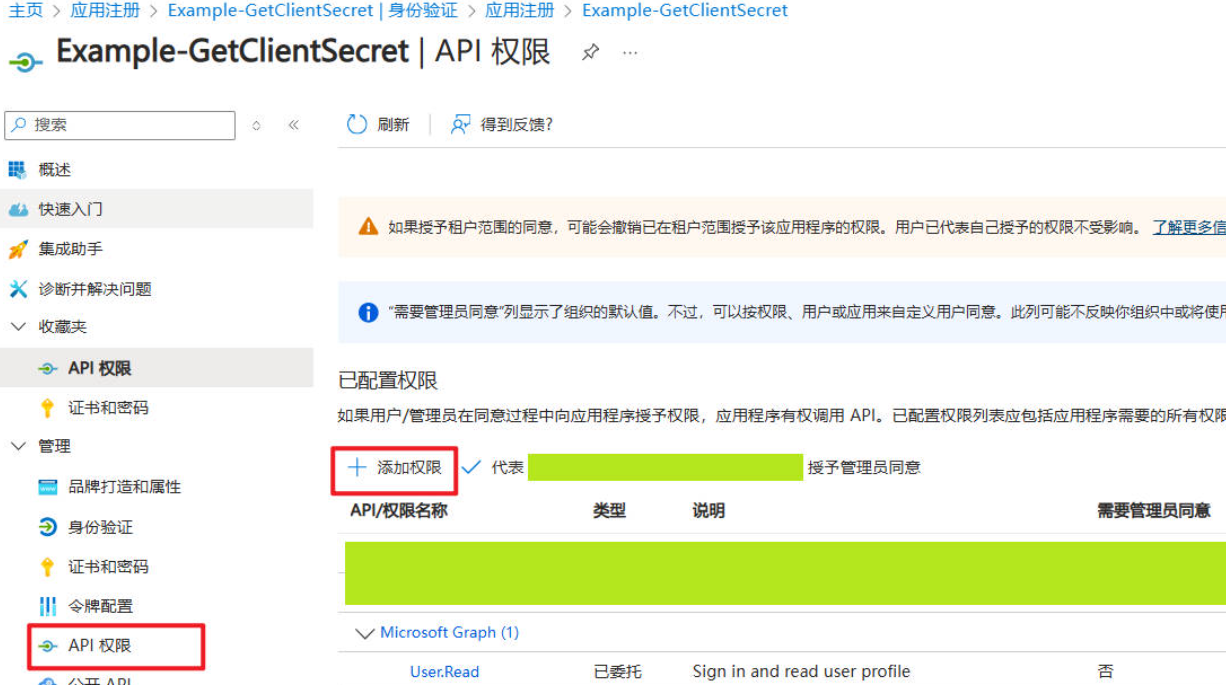
(1) API Permissions settings -> “+ Add a permission”
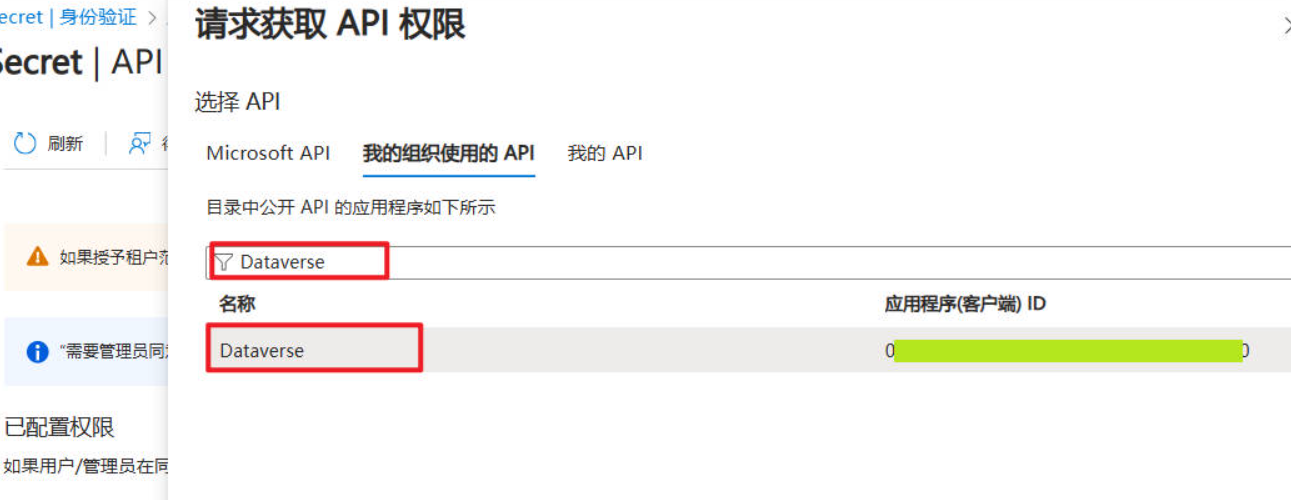
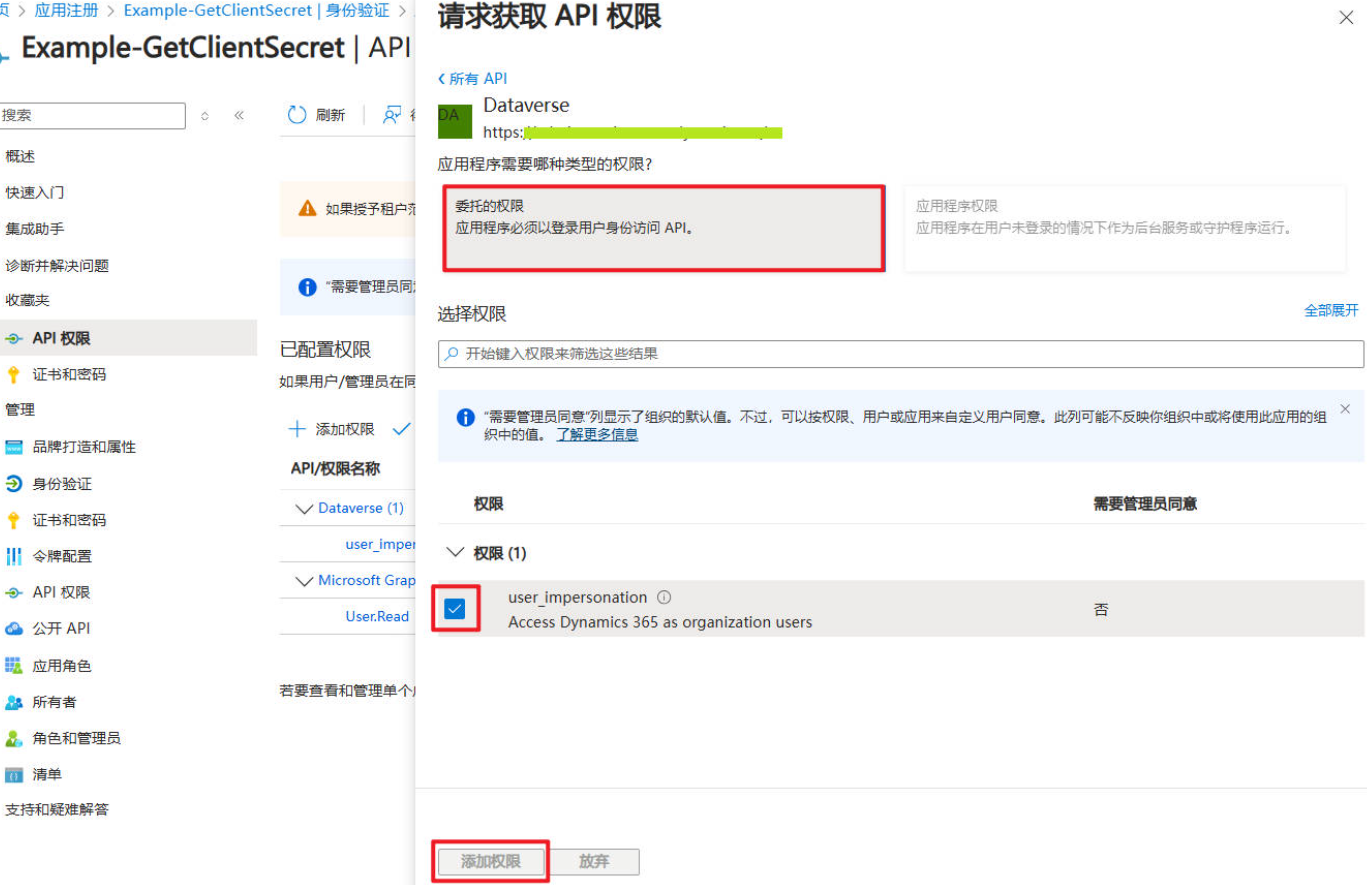
(2) “APIs my organization uses” -> Search for Dataverse -> Select Dataverse
Tip
If you can find Dynamics CRM in the Microsoft API, select Dynamics CRM. If not, follow the steps above and select Dataverse.
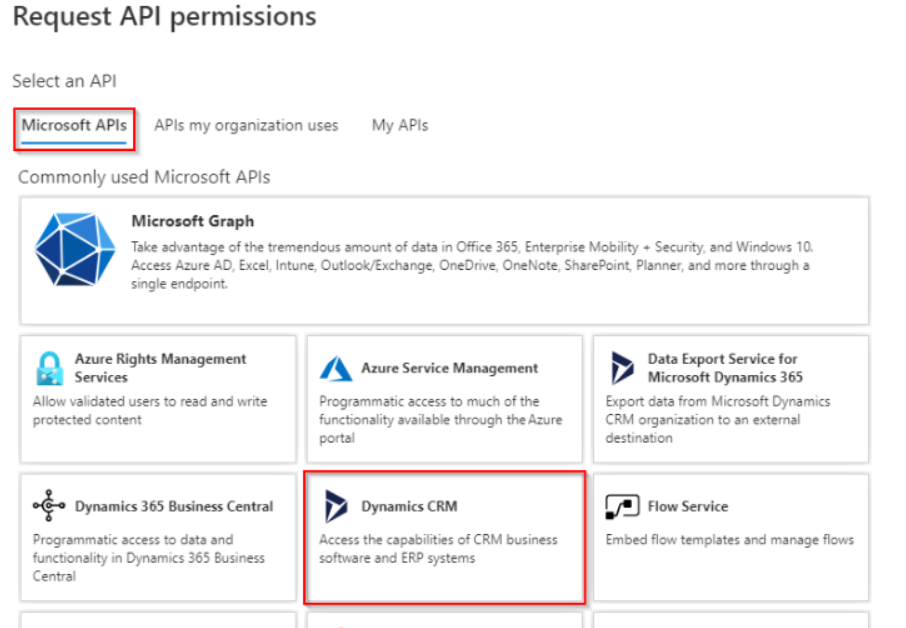
(3) Select delegated permissions -> Check permissions -> Add permissions
3. Postman Connection Testing
(1) Create a new Collection and give it a meaningful name, e.g., using-postman-call-crm

(2) Create an Environment
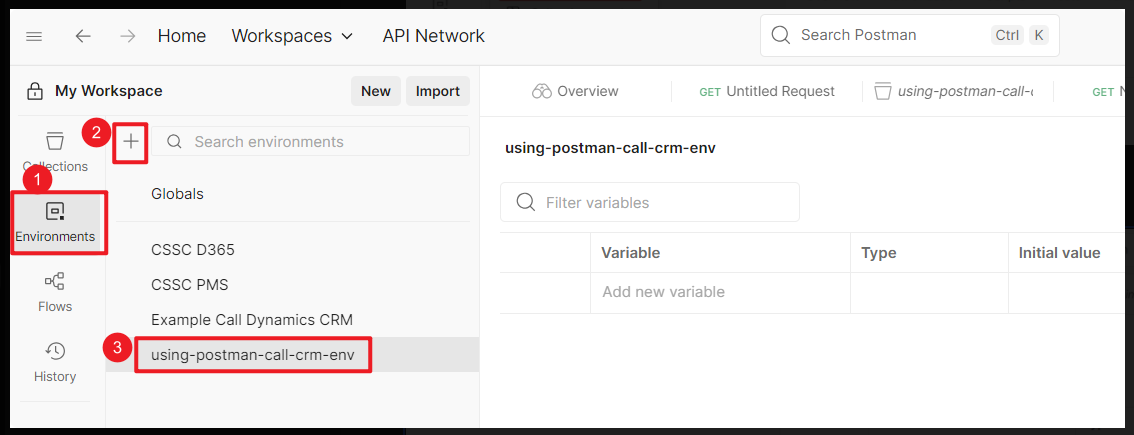
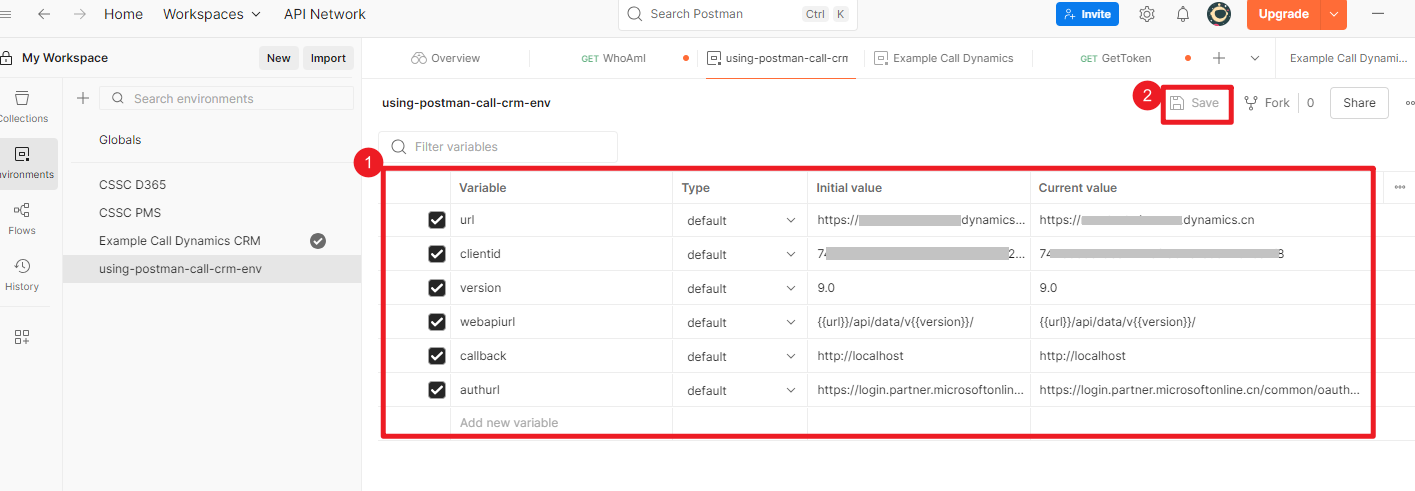
(3) Add environment variables
| # | Variable | Description/Example |
|---|---|---|
| 1 | url |
Your CRM environment URL |
| 2 | clientid |
ClientId of your application, as Geted in “Step 2. Get ClientId” |
| 3 | version |
9.0 |
| 4 | webapiurl |
{{url}}/api/data/v{{version}}/ |
| 5 | callback |
http://localhost |
| 6 | authurl |
https://login.partner.microsoftonline.cn/common/oauth2/authorize?resource={{url}} |
Tip
If you are using the Global version, use https://login.microsoftonline.com/common/oauth2/authorize?resource={{url}} for the authurl variable.
(4) Create a new request
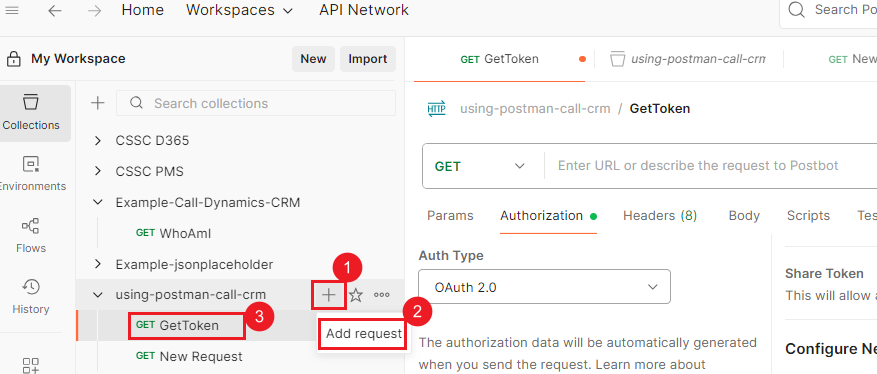
(6) Configure getting Token information for the request:
- Select Auth Type as OAuth 2.0
- Add authorization data to Request Head
- Choose a meaningful Token Name
- Select Grant Type as Implicit
- Fill in Callback URL as
{{callback}} - Fill in Auth URL as
{{authurl}} - Fill in Client ID as
{{clientid}} - Select Client Authentication as
Send as Basic Auth header
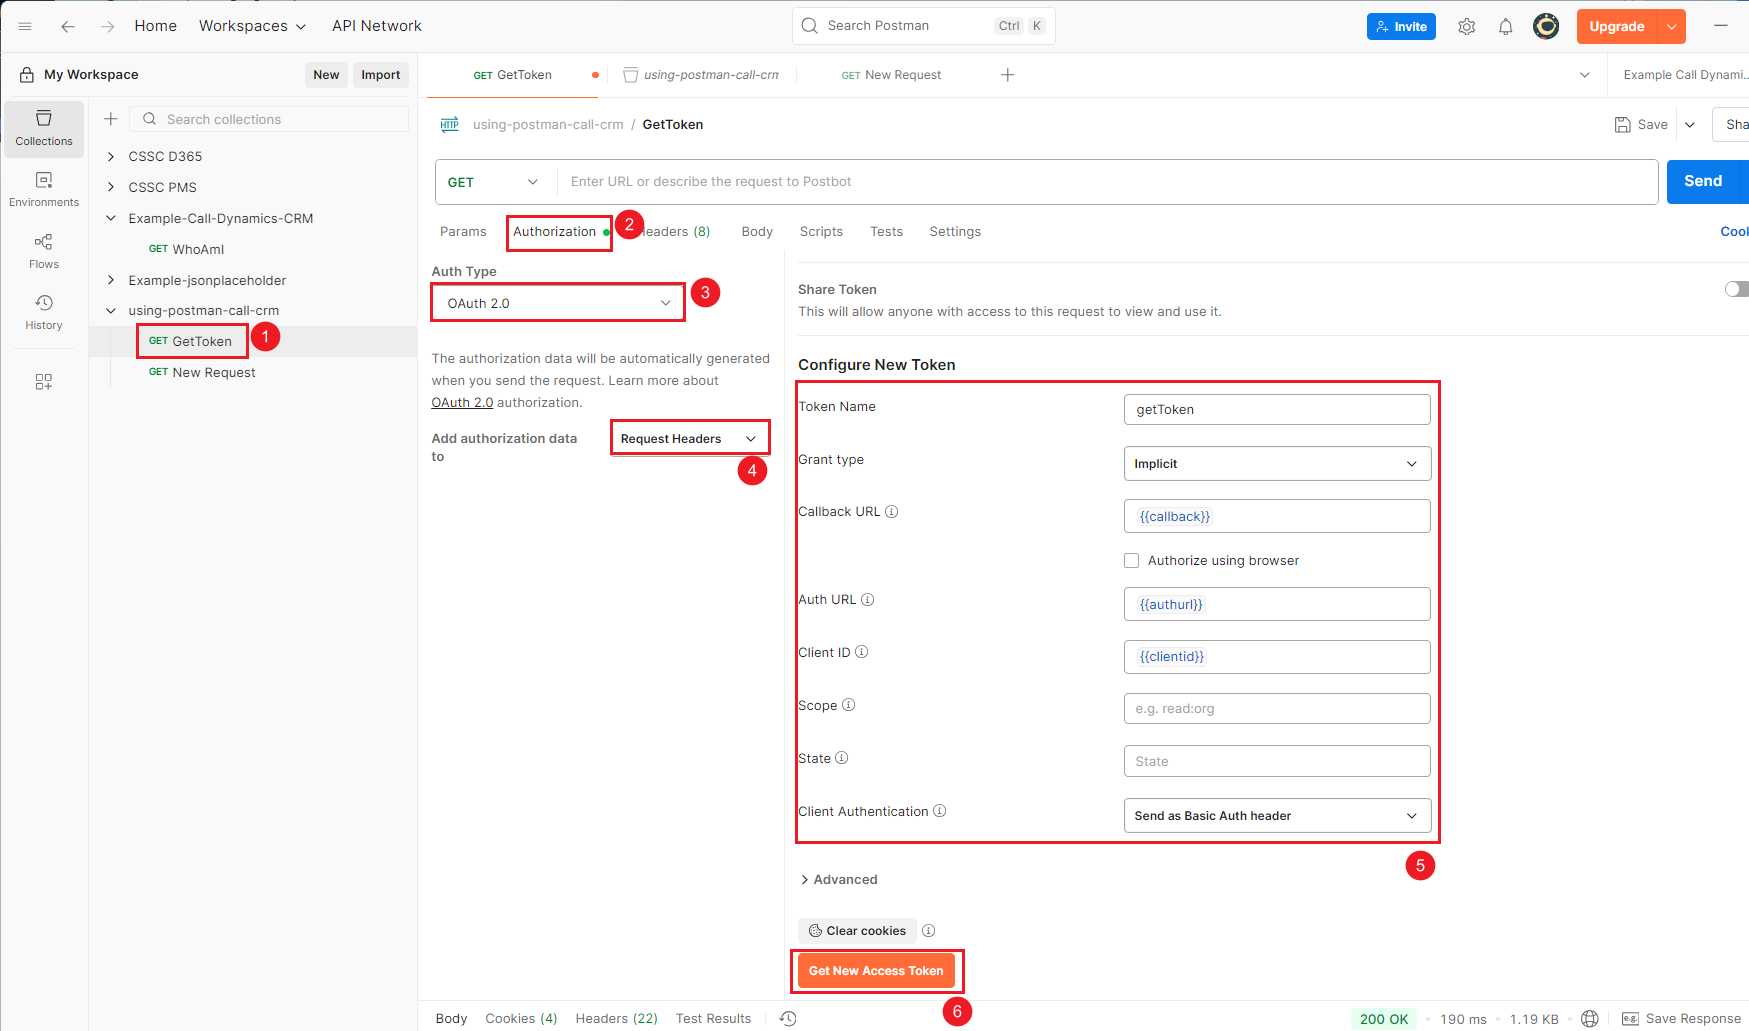
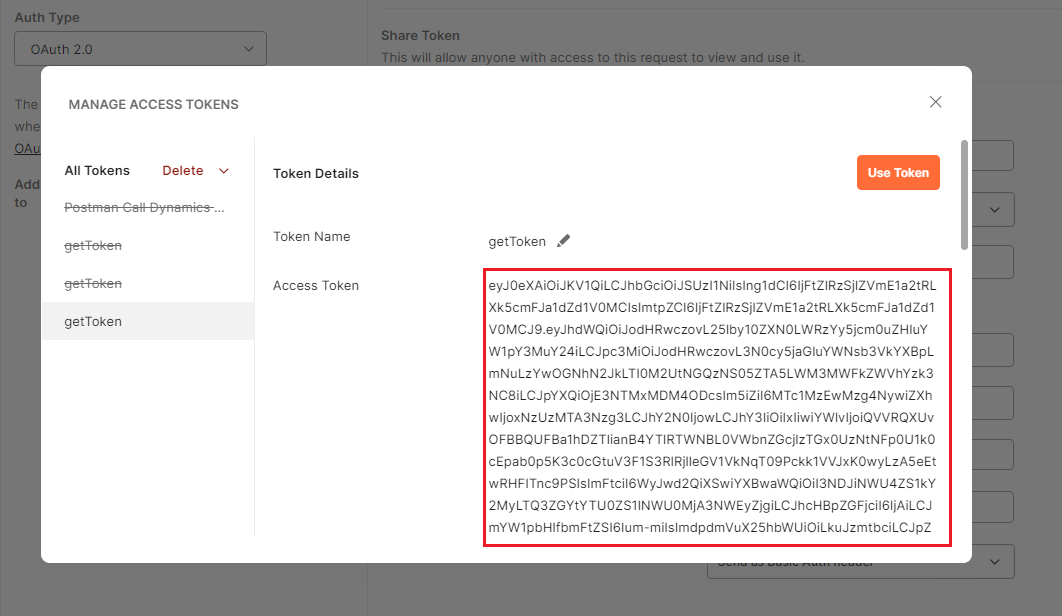
Clicking on Get New Access Token will prompt a login box. Fill in your account and password to Get the Token information.


Comments