This article explains how to develop custom reports in Dynamics 365 using FetchXML. The content is divided into two parts:
- Environment Setup
- Practical Example
1. Environment Setup
Please follow the steps in order to avoid unexpected issues.
- Visual Studio 2019
- SQL Server Data Tools
- Microsoft Reporting Services Projects Download
- Restart your computer.
- Install Dynamics 365 Report Authoring Extension Download
2. Practical Example
Instance Description (Function Description): Retrieve the last login time of the user.
Step 1: Create a Project
Open Visual Studio 2019 and create a report project:
- Create a new project.
- Search for “Report”, select “Report Server Project”, and click “Next.”
- Enter the “Project Name” and click “Create.”
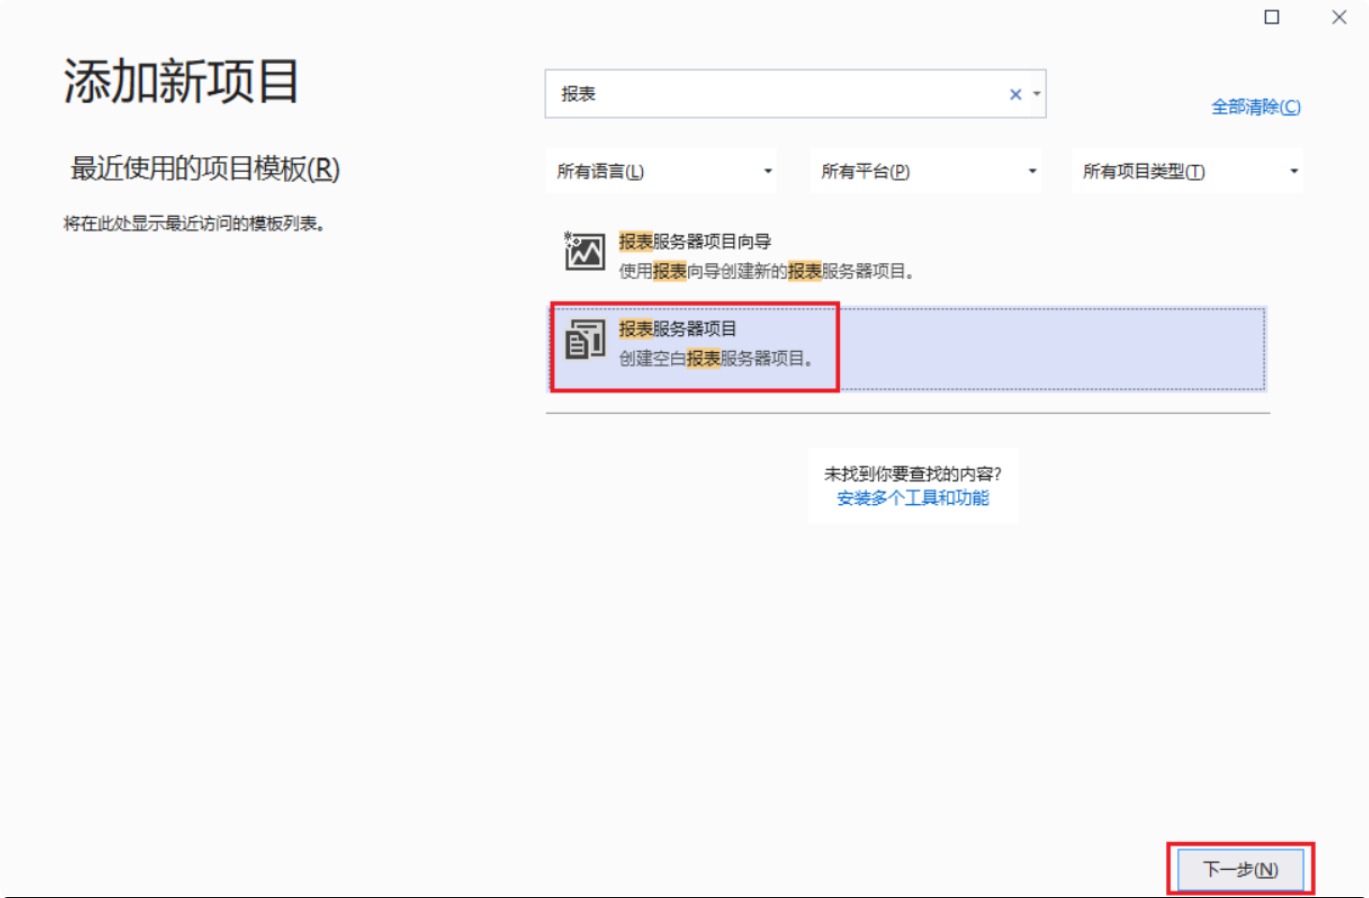
At this point, we have completed the creation of the report project, and the project file structure is as follows:

Step 2: Add a Report
- Right-click the “Reports” folder and select “Add”, then choose “New Item.”
- Select “Report”, enter the report name, and click “Add.”
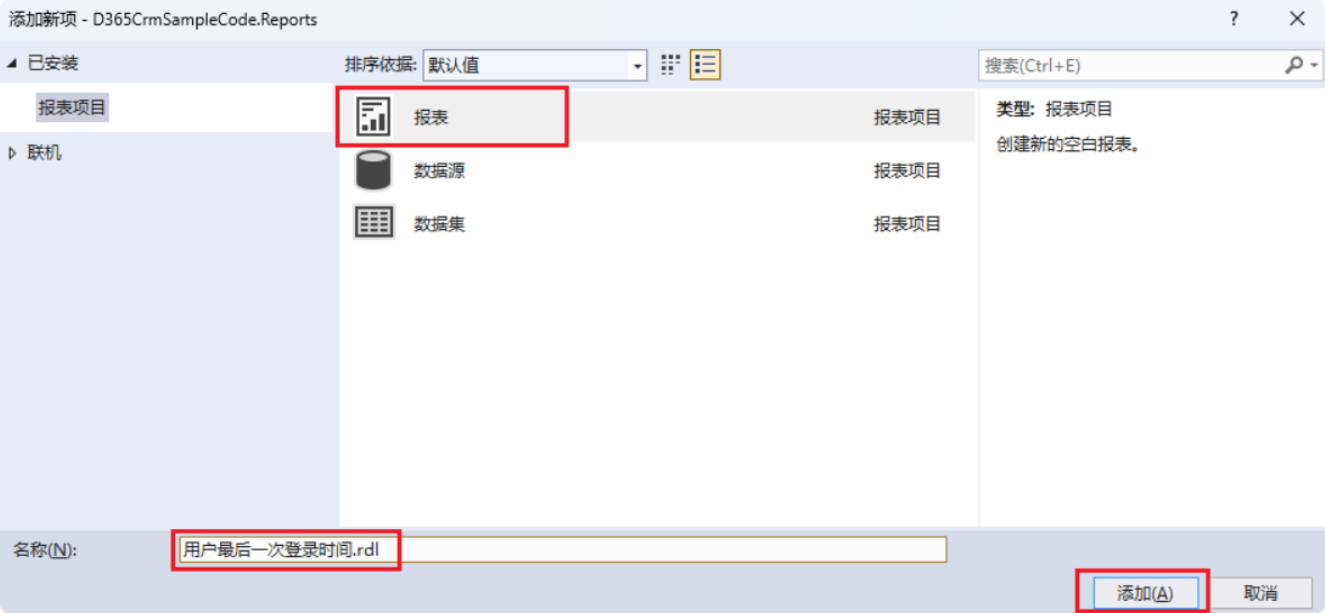
Now the report has been added, and the interface looks like this:
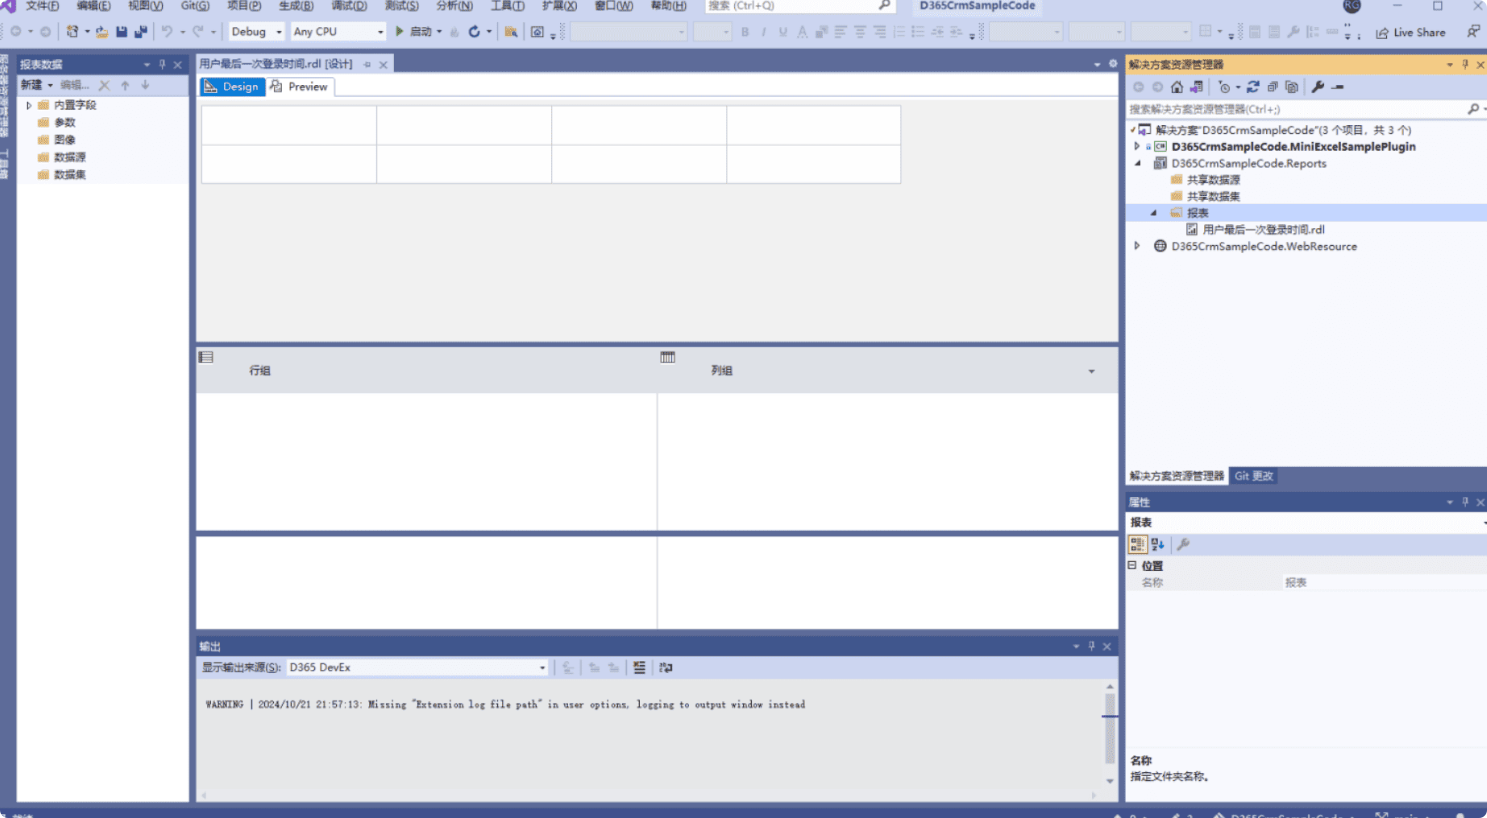
Step 3: Add a Data Source
- Right-click the “Data Sources” folder and select “Add Data Source.”
- Enter the “Data Source Name.”
- Choose the type
Microsoft Dynamics 365 Fetch. - Enter the “Connection String” and click “OK” (for how to get the connection string, please refer to the section on obtaining the connection string in this article).

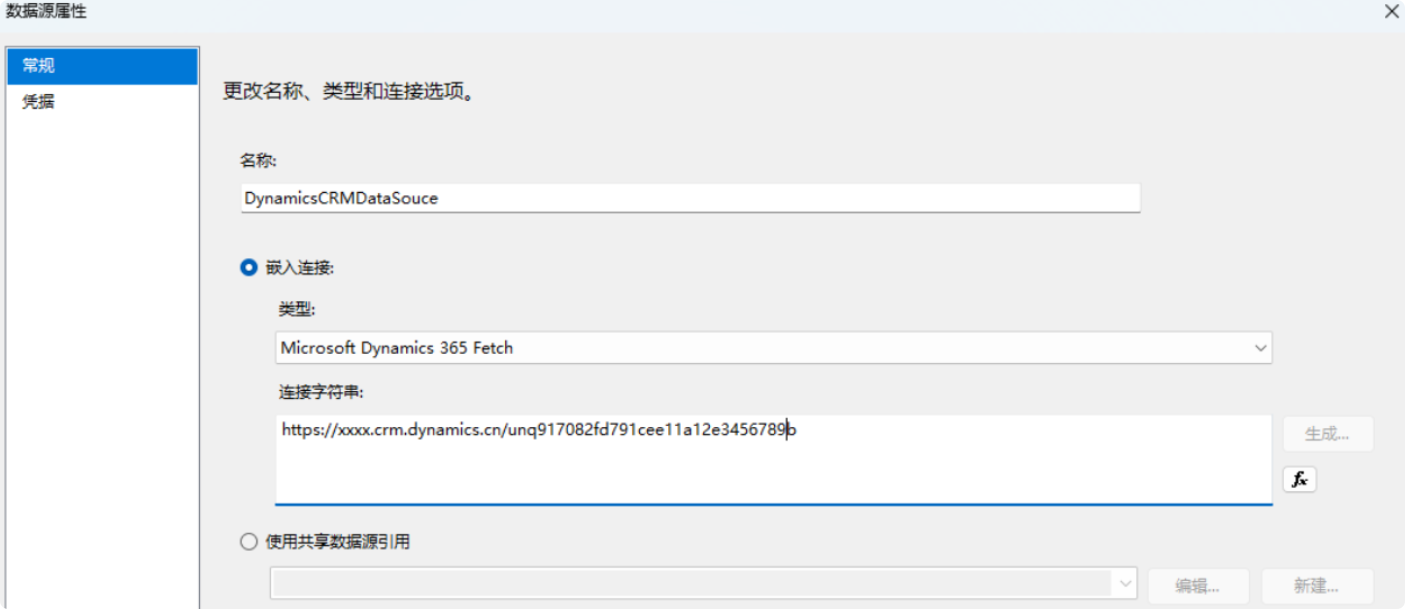
Note:
- If you accidentally closed the “Report Data” tab, you can open it using the shortcut
Ctrl + Alt + D. - You can name the data source according to your preference; I usually name it “DynamicsCRMDataSource.” This name is flexible, and you can use the default name as well, as it can be modified later.
Step 4: Prepare FetchXML
<fetch aggregate="true">
  <entity name="audit">
    <attribute name="createdon" alias="LastLoginDate" aggregate="max" />
    <filter>
      <condition attribute="operation" operator="eq" value="4" />
    </filter>
    <link-entity name="systemuser" from="systemuserid" to="objectid" link-type="inner" alias="SystemUser">
      <attribute name="fullname" alias="FullName" groupby="true" />
      <attribute name="domainname" alias="DomainName" groupby="true" />
      <attribute name="isdisabled" alias="IsDisabled" groupby="true" />
      <attribute name="accessmode" alias="AccessMode" groupby="true" />
      <attribute name="userlicensetype" alias="UserLicenseType" groupby="true" />
    </link-entity>
  </entity>
</fetch>Step 5: Add a Dataset
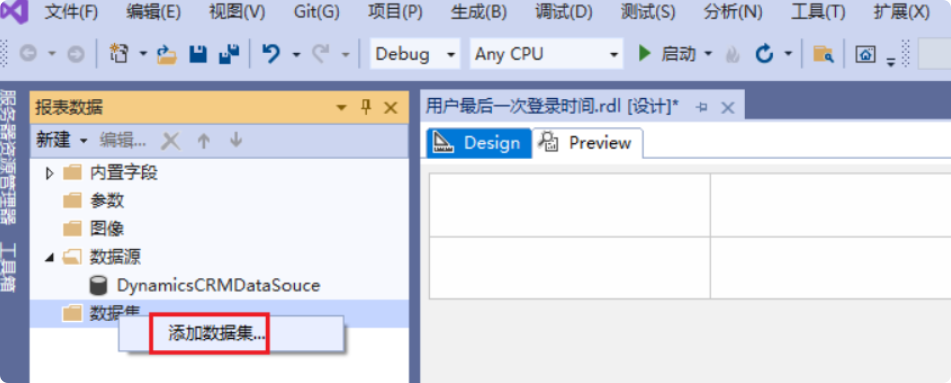
- Right-click the dataset folder and choose “Add Dataset.”
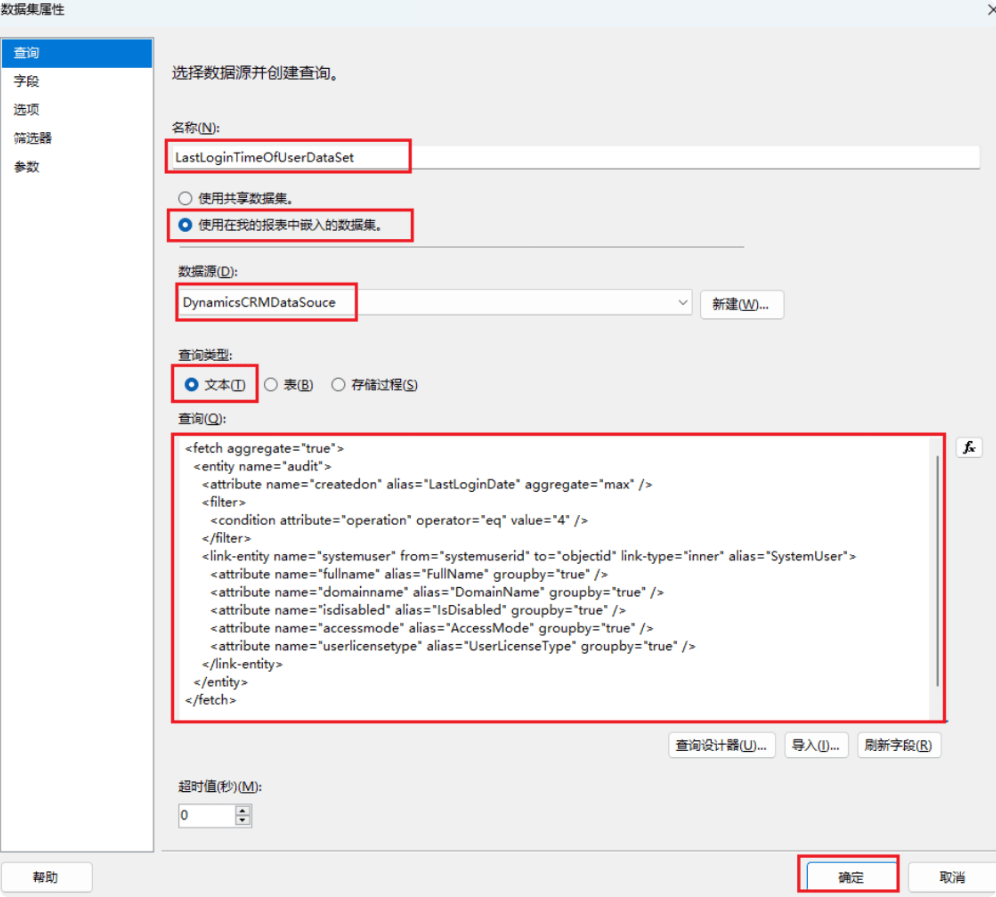
- Enter the “Dataset Name”, select “Use a dataset embedded in my report,” and choose the DynamicsCRMDataSource data source we just added.
- Choose “Text” for the query type, fill in the Fetch, and click “OK” (if a login prompt appears after clicking “OK”, log in with your development account).
Step 6: Report Design
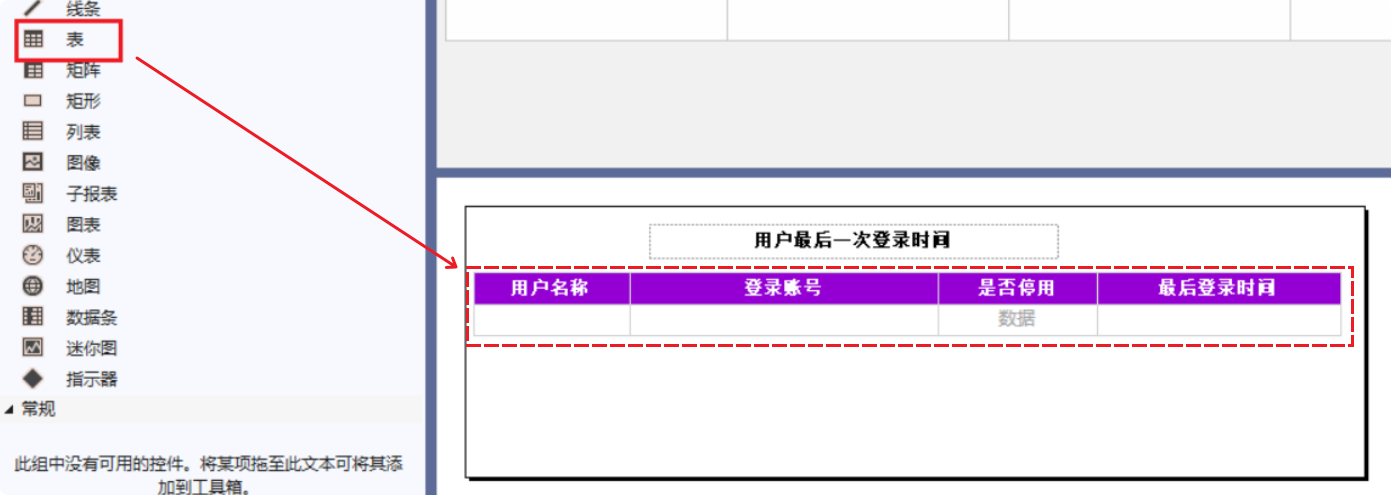
- Select the “Textbox” from the toolbox, drag it to the report design interface, and fill in the title.

- Select the “Table” from the toolbox, drag it to the report design interface, input the Column Headers, and adjust the styles according to your needs.
Step 7: Data Binding
For example, for the “User Name” column: right-click the empty space below the user name and select “Expression.”
Choose “Fields,” then double-click “FullName” to automatically update the expression.
Of course, you can also write the expression manually.
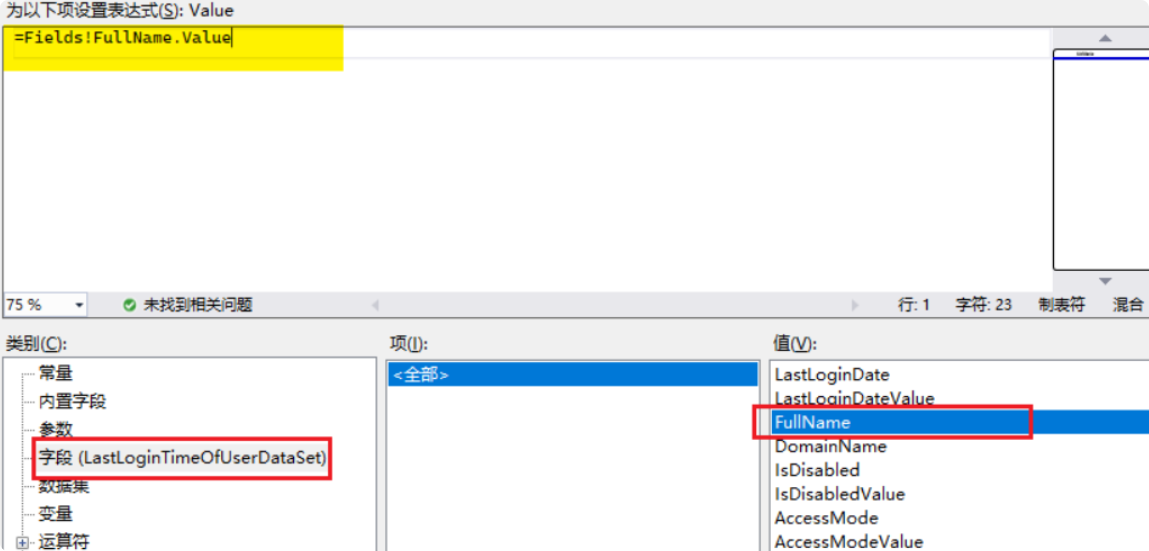
Finally, click “OK,” and bind data for the other columns in sequence.

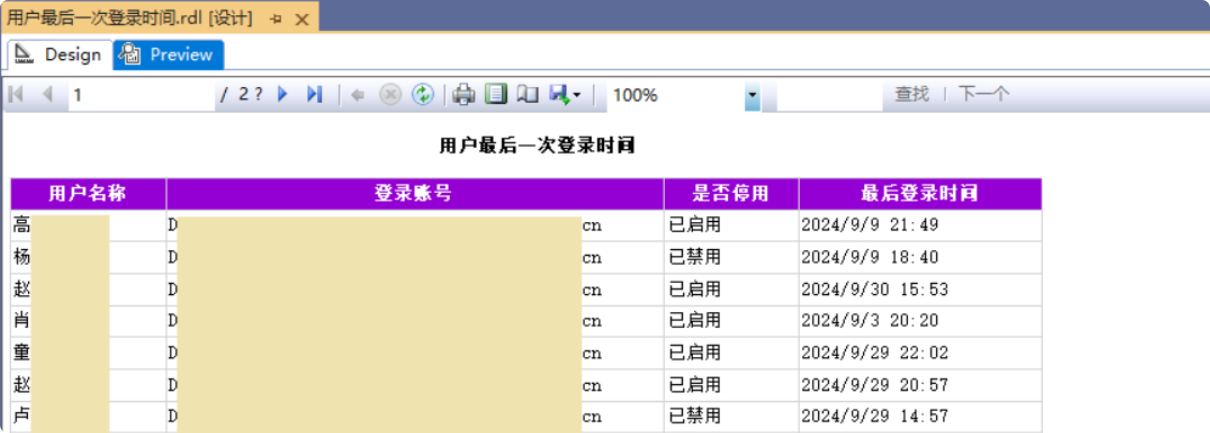
Step 8: Test (Preview) the Report
Click the Preview tab to view the report.

Result:
Step 9: Publish the Report
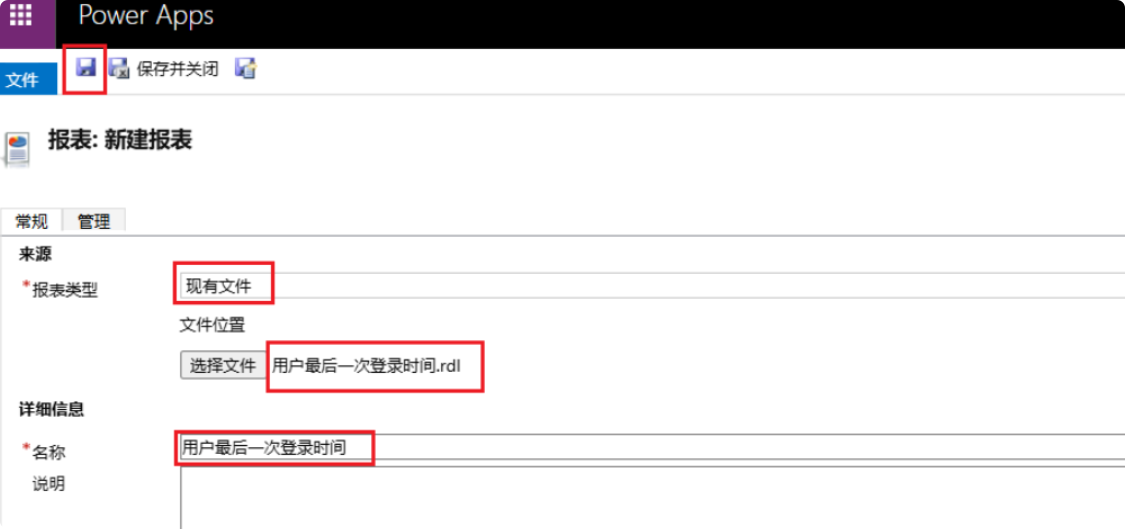
- Go to Power Apps –> Create a new solution –> Click “New” –> Select “Report.”

Enter the “Report Name” and click “Save” at the end.
Congratulations! You have completed the instance, and you can now open and preview it in the report entity.

In Dynamics 365, I generally classify custom-developed reports into two categories:
- “Global Reports”: The report created in this instance falls into this category, where the execution location is typically in the report entity or the view button bar of a specific business entity.
- “Single Record Reports”: These reports are usually placed on the form of a business record, with parameters primarily taking the Guid of a specific business record.
Obtaining the Connection String
The format of the connection string: {Environment URL}/{Environment Unique Name}
Example:
- Environment URL:
https://sample.crm.dynamics.cn - Environment Unique Name:
123456789 - Connection String:
https://sample.crm.dynamics.cn/123456789
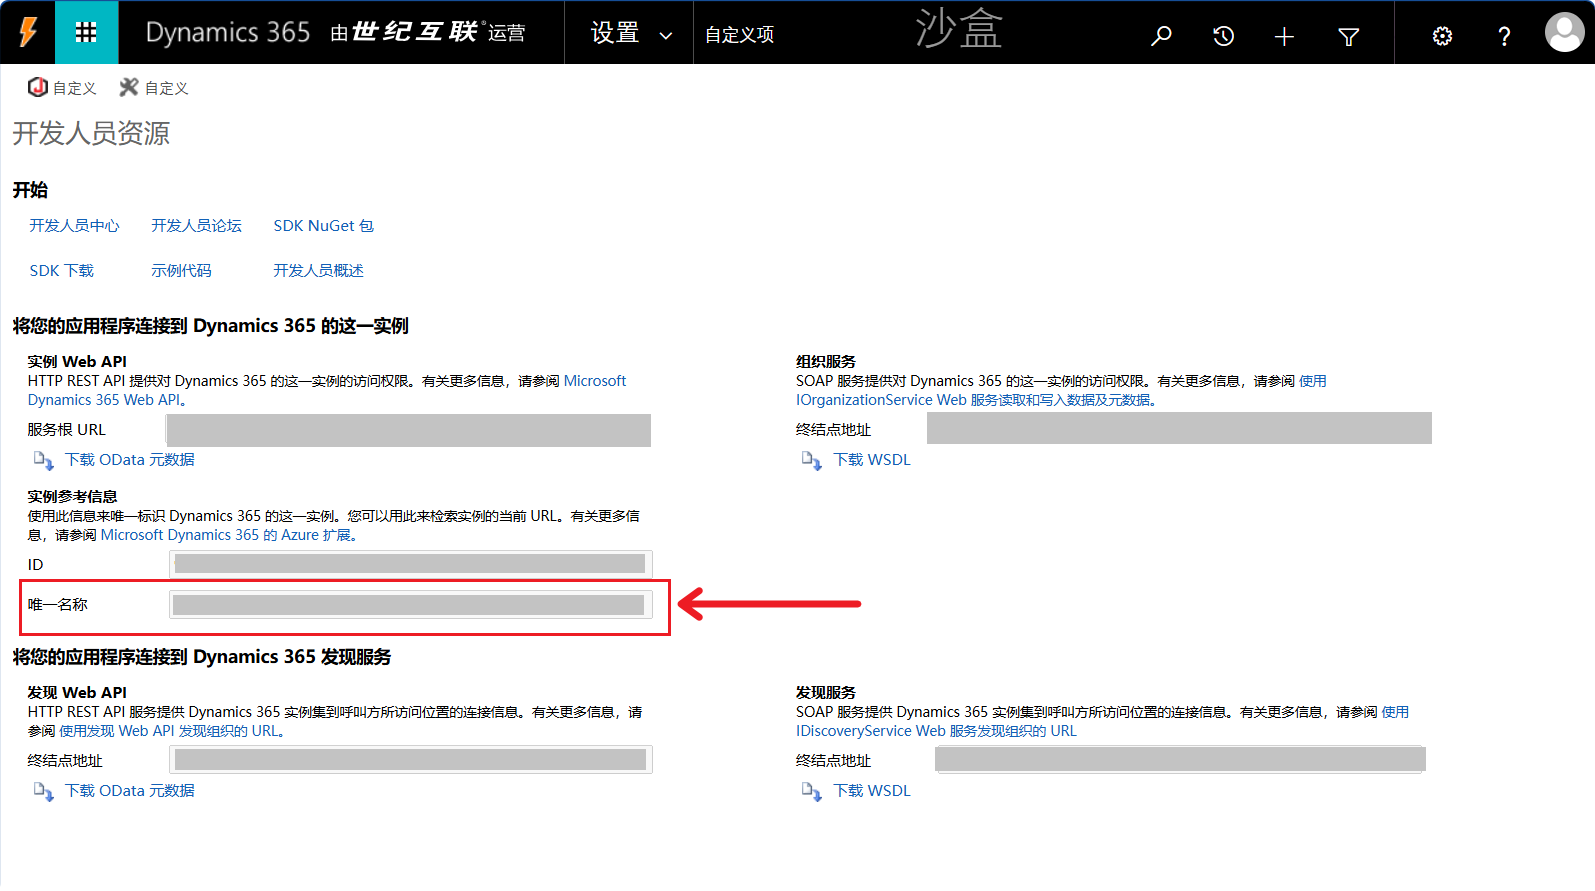
How to Obtain the Environment Unique Name?
UCI Interface
- Open Power Apps: International Version, 21V Version.
- Click the settings button in the upper right corner and select “Developer Resources.”


Classic UI Interface
- Settings –> Customizations
- Select “Developer Resources.”




Comments