Introduction
This article demonstrates how to connect to Dynamics 365 (D365) using Office365 authentication within a Console Application (.NET Framework).
In fact, Microsoft.Xrm.Tooling.Connector provides multiple authentication types, but based on my project experience, the two most frequently used are: Office365 and ClientSecret.
List of Authentication Types:
| # | Name | Value | Description |
|---|---|---|---|
| 1 | InvalidConnection | -1 | Invalid connection |
| 2 | AD | 0 | Active Directory Auth |
| 3 | Live | 1 | Live Auth |
| 4 | IFD | 2 | SPLA Auth |
| 5 | Claims | 3 | CLAIMS based Auth |
| 6 | Office365 | 4 | Office365 base login process |
| 7 | OAuth | 5 | OAuth based Auth |
| 8 | Certificate | 6 | Certificate based Auth |
| 9 | ClientSecret | 7 | Client Id + Secret Auth type |
| 10 | ExternalTokenManagement | 99 | Host manages Auth token for CRM connections |
Detailed Steps
1. Create a Console Application for Testing
Step 1. Create a New Project
- Open Visual Studio and create a new Console App (.NET Framework) project.
- Enter a meaningful project name → select the framework → click Create.
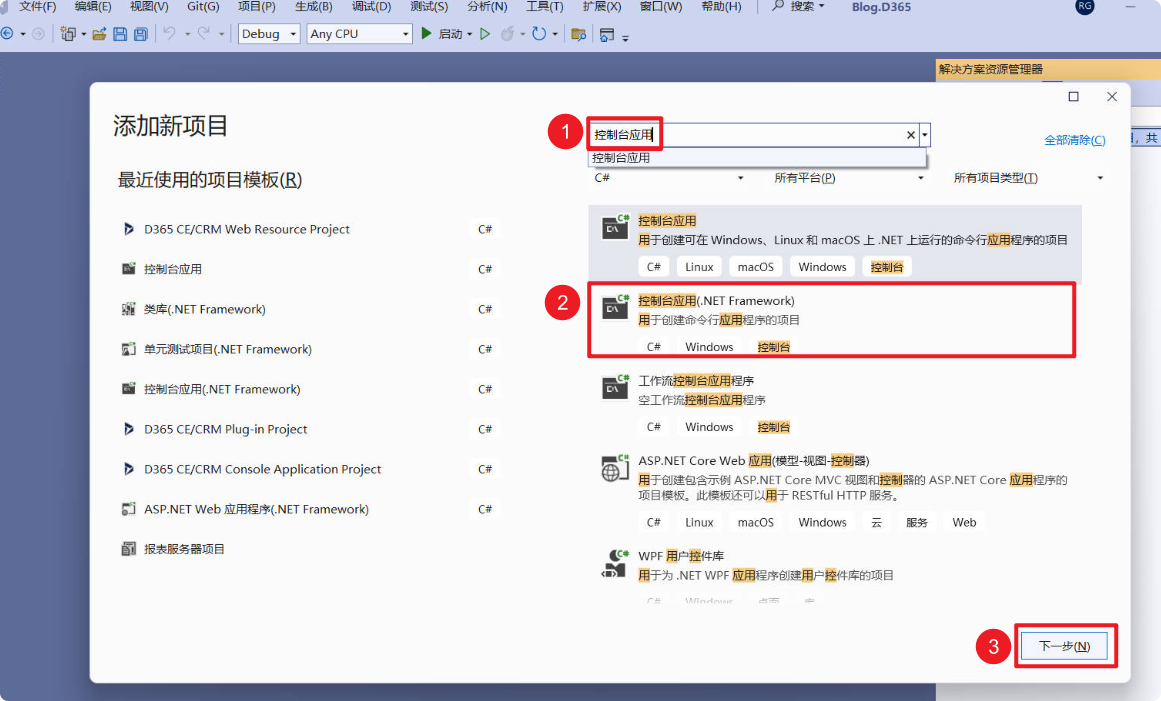
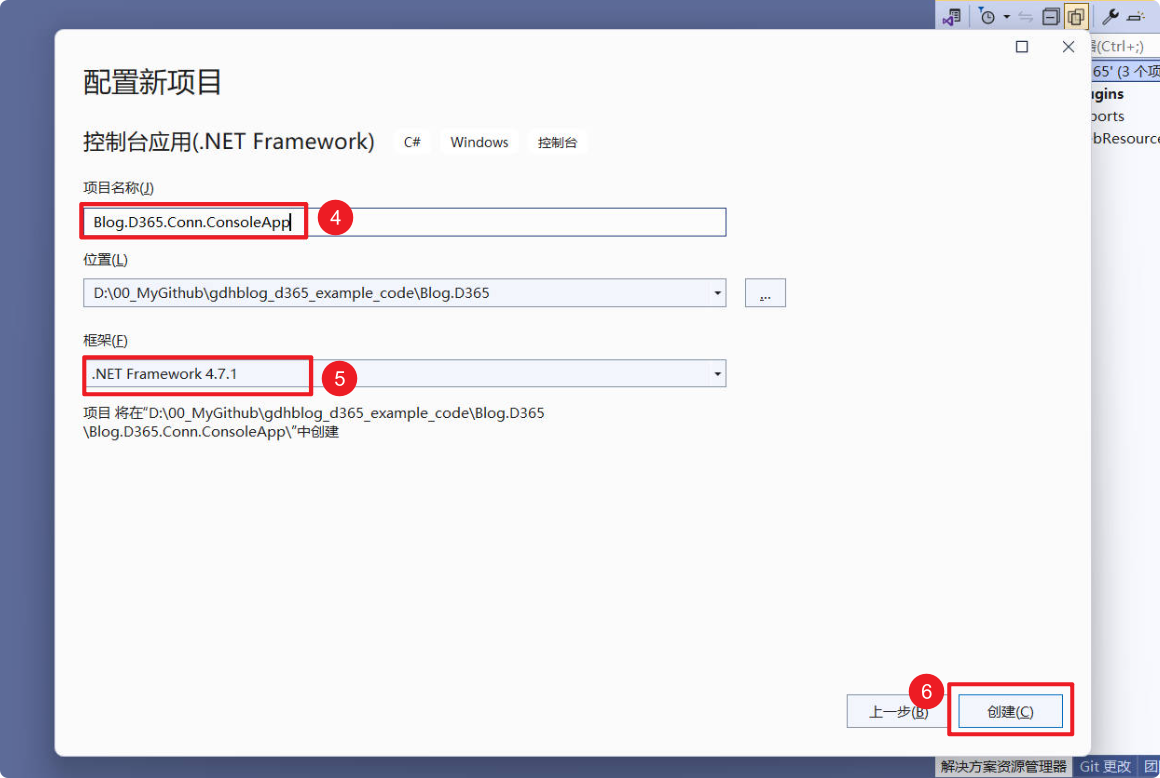
Step 2. Add Dependencies to the Project
Required packages:
Microsoft.CrmSdk.CoreAssembliesSystem.Configuration.ConfigurationManager
Right-click your project → Manage NuGet Packages.
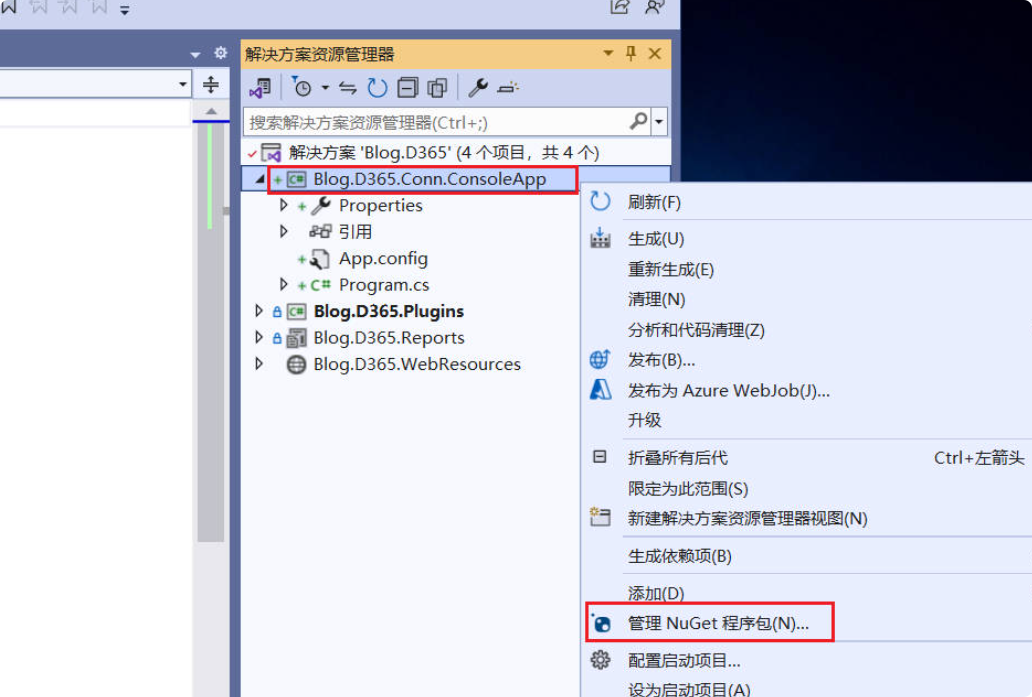
In the new window, select the Browse tab and search for Microsoft.CrmSdk.CoreAssemblies.
From the results, select Microsoft.CrmSdk.CoreAssemblies → click Install → click Accept in the popup.
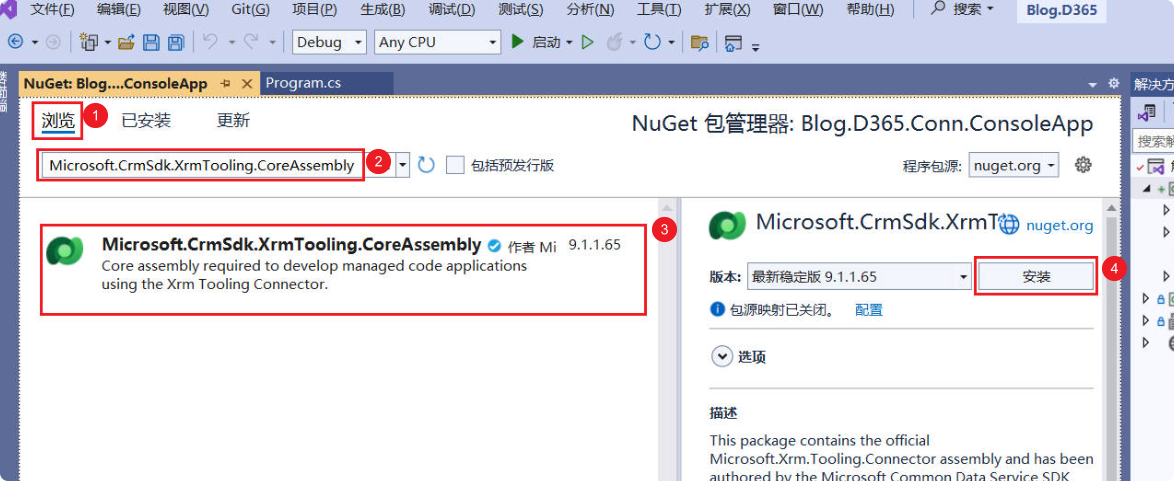
Now that Microsoft.CrmSdk.CoreAssemblies is installed, repeat the same steps to install System.Configuration.ConfigurationManager.
Step 3. Add Connection Information to App.config
In App.config, add your connection information (connectionStrings), replacing the placeholders with your environment details:
urlofyourdynamics365instance→ Your environment access URL, e.g.,https://xxx.crm.dynamics.cn/yourusername→ Your login usernameyourpassword→ Your login password
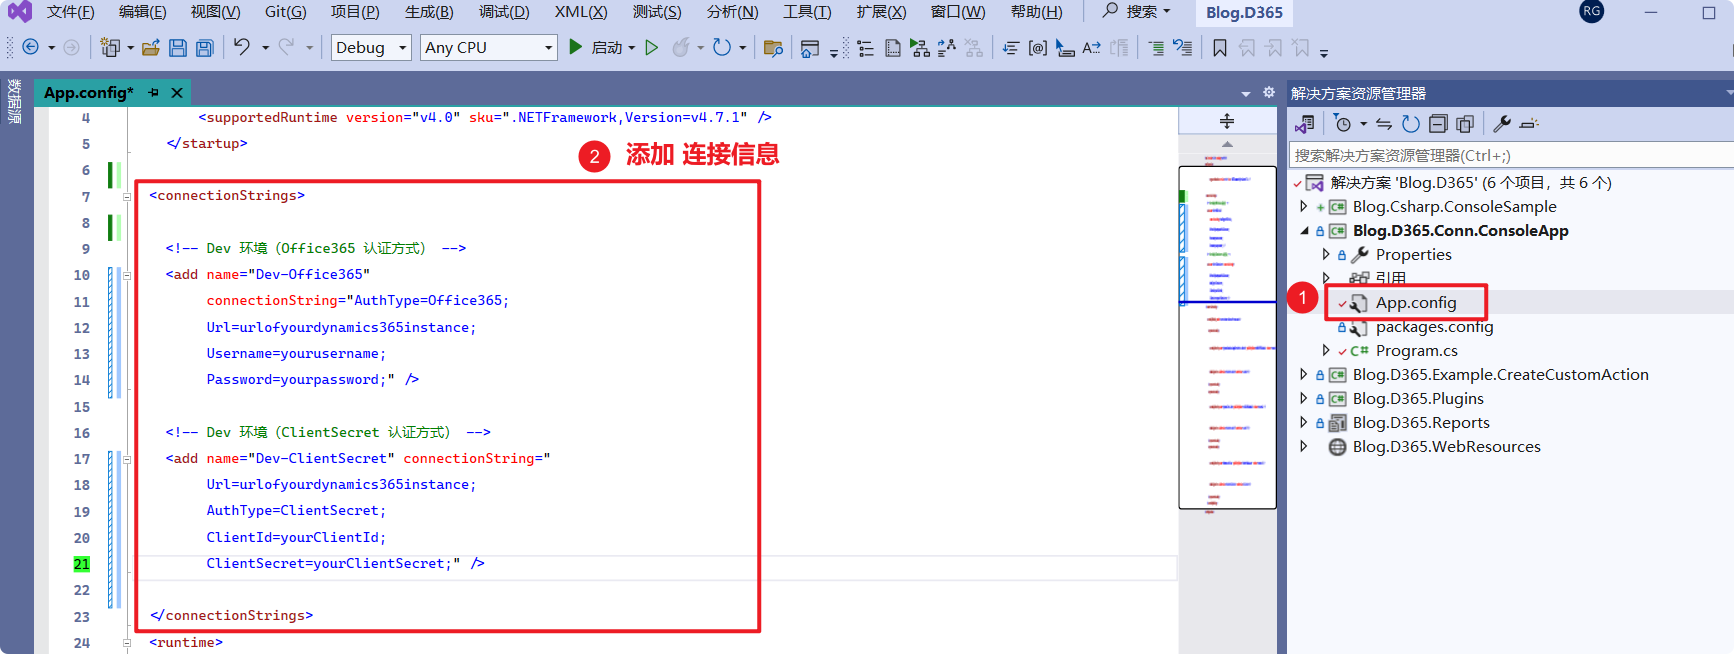
<connectionStrings>
  <!-- Dev Environment (Office365 Authentication) -->
  <add name="Dev-Office365"
       connectionString="AuthType=Office365;
       Url=urlofyourdynamics365instance;
       Username=yourusername;
       Password=yourpassword;" />
</connectionStrings>Step 4. Add Test Code
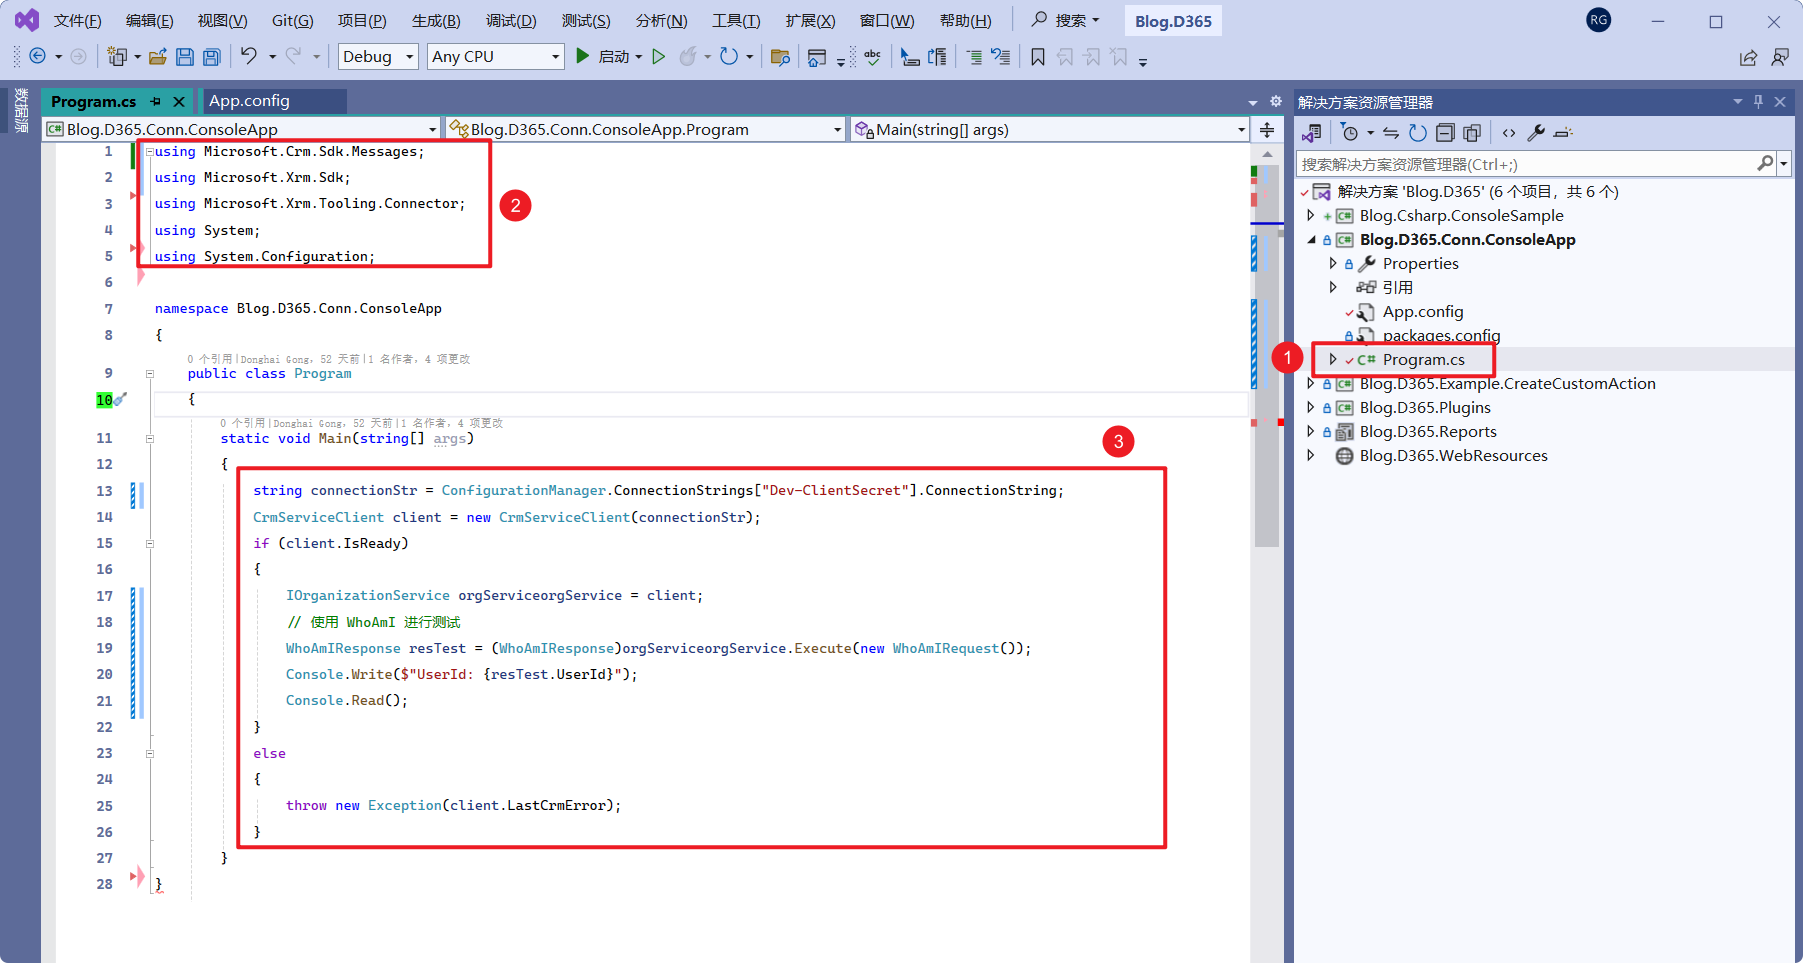
- Open Program.cs.
- Replace the
usingstatements with the following:
using Microsoft.Crm.Sdk.Messages;
using Microsoft.Xrm.Sdk;
using Microsoft.Xrm.Tooling.Connector;
using System;
using System.Configuration;- Add the following code inside the Main method:
string connectionStr = ConfigurationManager.ConnectionStrings["Dev-Office365"].ConnectionString;
CrmServiceClient client = new CrmServiceClient(connectionStr);
if (client.IsReady)
{
    IOrganizationService orgService = client;
    // Test with WhoAmI
    WhoAmIResponse resTest = (WhoAmIResponse)orgService.Execute(new WhoAmIRequest());
    Console.Write($"UserId: {resTest.UserId}");
    Console.Read();
}
else
{
    throw new Exception(client.LastCrmError);
}Step 5. Test
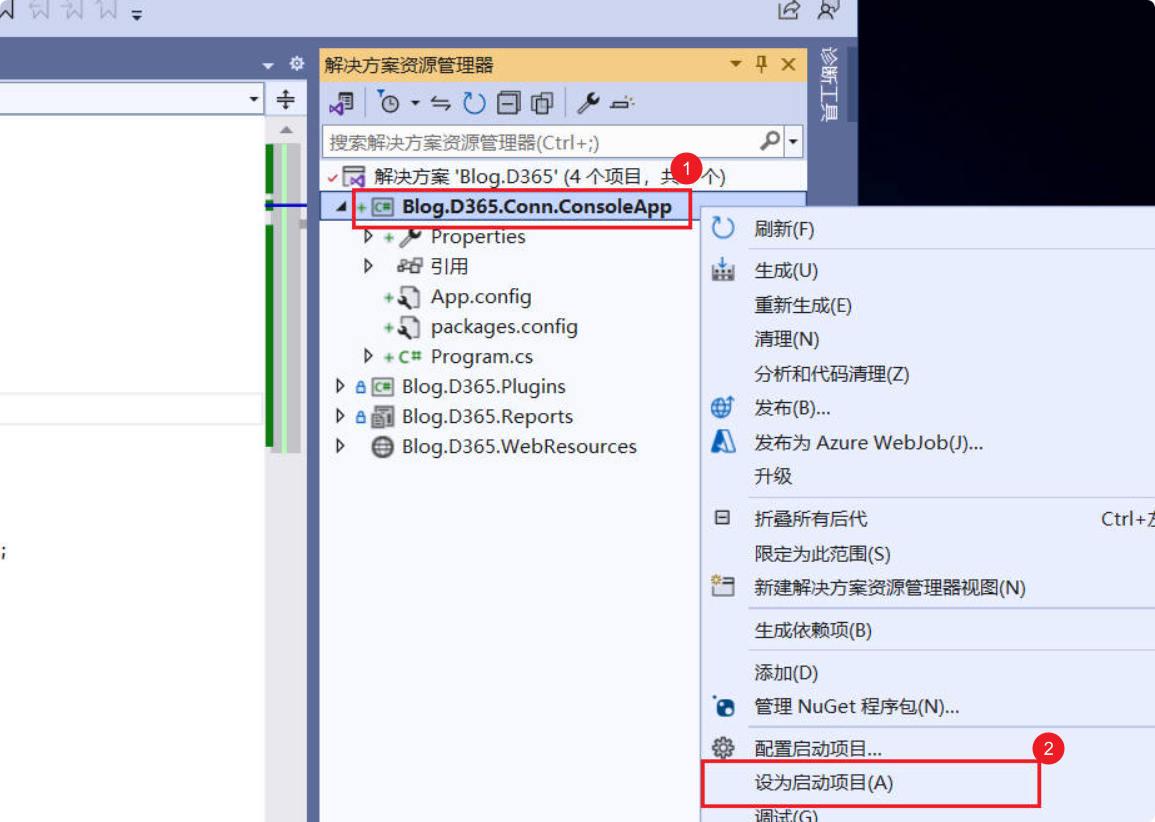
-
Right-click your project → Set as Startup Project.
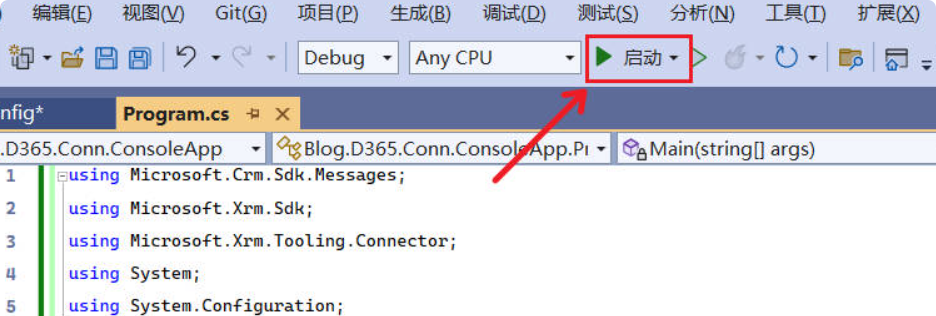
-
Run the program using F5 or the Start button at the top.
If everything works correctly, the user’s Id will be printed. From here, you can proceed to perform CRUD operations with IOrganizationService.


Comments