0.Brief description
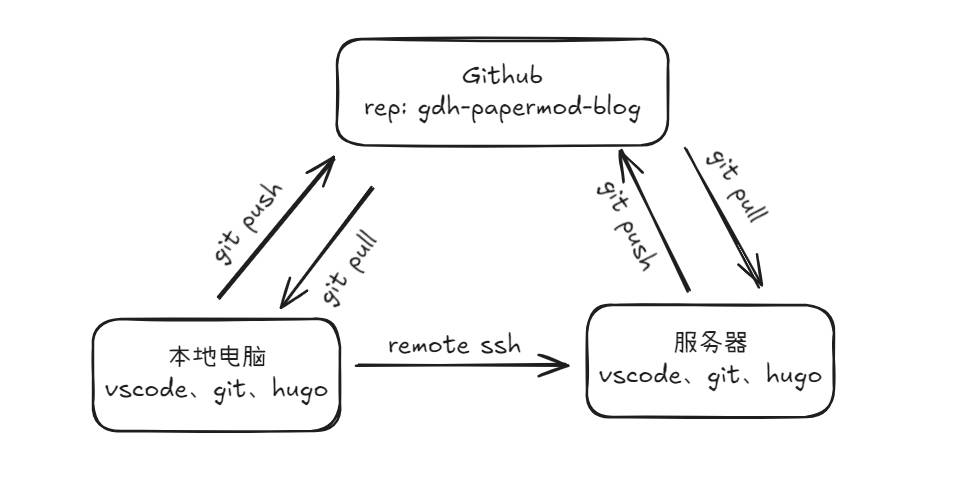
Writing Methods
- local computer connects to the server via vscode’s remote ssh, then writes the blog in vscode, then compiles it via
hugowhen it’s done - sometimes I write on my local computer, push it to github, and then pull the code from the server and compile it with
hugo.
The rough order of events is as follows (a quick diagram)
1.Environmental information
| Classification/Environment | local computer | Server (2G2C) |
|---|---|---|
| Systems | Window 11 | Debian 12 |
| Software | (1)Visual Studio Code (2)Git 3.Hugo | (1)1Panel (2)Git (3)Hugo |
2.Deployment method
Foolproof site building through 1Panel panel
About update
Install SSH on both local computer and server, adjust website (new/updated) via Visual Studio Code + SSH on local computer.
3.About Backup
Backups are mainly through Github private storage, blog images are stored on the server, and then set to automatically back up once a week.
4.Website prelude (preparation)
4.1 Github
- Visit Github and register for an account.
- Create a new personal repository (it is recommended to create a private repository)
4.2 local computer
| No. | Software/tools | Download address |
|---|---|---|
| 1 | Git | Download |
| 2 | Visual Studio Code | Download |
| 3 | SSH | windows 11 Installed by default |
| 4 | Hugo(extended version) |
The process of downloading and installing Git and Visual Studio Code is very simple, just follow the prompts in the ‘Installation screen’ and click ‘Next’, so I won’t go into details.
4.2.1 SSH
Windows 11 installs SSH by default, if you are not sure you can use the following command to confirm.
Open PowerShell as administrator and run
Right mouse click on the Win icon in the bottom left corner of the screen to see “Terminal Administrator”
# Checking the Installation Status of OpenSSH
Get-WindowsCapability -Online | Where-Object Name -like  'OpenSSH*'
If SSH is already installed, the terminal will print:
# An OpenSSH.Client status of Installed means that the OpenSSH client has been successfully installed.
# If the status is NotPresent, then it is not yet installed.
Name  : OpenSSH.Client~~~~0.0.1.0
State : Installed

Name  : OpenSSH.Server~~~~0.0.1.0
State : NotPresent
If it is not installed, it can be installed with the following command
Add-WindowsCapability -Online -Name OpenSSH.Client~~~~0.0.1.0
4.2.2 Hugo
There are many ways to install Hugo, but I chose the Prebuilt binaries installation method.
- Download hugo_extended_withdeploy_0.145.0_windows-amd64.zip
- Extract the package to
D:/hugo/hugo_extended_withdeploy_0.145.0, create a new directory if you don’t have one. - Add the directory to the PATH environment variable.
- Open a terminal and type
hugo versionto verify that the installation was successful.
hugo version
If the installation is successful, it will print:
hugo v0.145.0-666444f0a52132f9fec9f71cf25b441cc6a4f355+extended+withdeploy windows/amd64...
One more thing: if there is no particular Hugo bug, it is recommended not to upgrade the Hugo version.
Because Hugo’s authors don’t consider whether to ‘fit’ with commercially available themes when iterating Hugo, if you update Hugo’s version, it may appear that the blog won’t compile (generating public folders)
4.2.3 Github Key Pairs
(1)Open a terminal and enter the following command to generate the key
ssh-keygen -t ed25519 -C "your-email@example.com"
(2)View and copy the public key (copy the long string inside)
(3)Login to GitHub and add SSH key –> Click New SSH key –> Fill in a name (e.g.: mykey), then paste the content of the public key you just copied into it and save it.
(4)Open a terminal and enter the following command to verify completion
ssh -T git@github.com
If the configuration is OK, it will print something similar:
Hi Your GitHub username! You've successfully authenticated, but ...
4.3 Server
4.3.1 Installing 1Panel
1Panel official documentation is quite clear, you can check it, if you have Dabian 12 system like me, you can directly refer to the following installation steps.
(1) Make sure that the Debian 12 system is brand new (reinstalled)
(2) Enter the following installation commands in the command console and wait patiently
curl -sSL https://resource.fit2cloud.com/1panel/package/quick_start.sh -o quick_start.sh && bash quick_start.sh

During the installation process, you will be asked to choose the language, select Chinese Chinese (Simplified) that is, the rest can be directly default (press enter)
After successful installation, please record your login information (address, panel user, panel password).
[1Panel 2025-04-27 09:01:50 install Log]: ======感谢您的耐心等待,安装已完成======
[1Panel 2025-04-27 09:01:50 install Log]:
[1Panel 2025-04-27 09:01:50 install Log]: 请使用您的浏览器访问面板:
[1Panel 2025-04-27 09:01:50 install Log]: 外部地址:  http://199.245.100.177:27951/97c02939d9
[1Panel 2025-04-27 09:01:50 install Log]: 内部地址:  http://199.245.100.177:27951/97c02939d9
[1Panel 2025-04-27 09:01:50 install Log]: 面板用户:  2cc9b06c55
[1Panel 2025-04-27 09:01:50 install Log]: 面板密码:  2538407029
[1Panel 2025-04-27 09:01:50 install Log]:
[1Panel 2025-04-27 09:01:50 install Log]: 官方网站: https://1panel.cn
[1Panel 2025-04-27 09:01:50 install Log]: 项目文档: https://1panel.cn/docs
[1Panel 2025-04-27 09:01:50 install Log]: 代码仓库: https://github.com/1Panel-dev/1Panel

[1Panel 2025-04-27 09:01:50 install Log]:
[1Panel 2025-04-27 09:01:50 install Log]: 如果您使用的是云服务器,请在安全组中打开端口 27951
[1Panel 2025-04-27 09:01:50 install Log]:
[1Panel 2025-04-27 09:01:50 install Log]: 为了您的服务器安全,离开此屏幕后您...
[1Panel 2025-04-27 09:01:50 install Log]:
[1Panel 2025-04-27 09:01:50 install Log]: ======
(3) Open external access ports (as needed), for example, the above port is 27951.
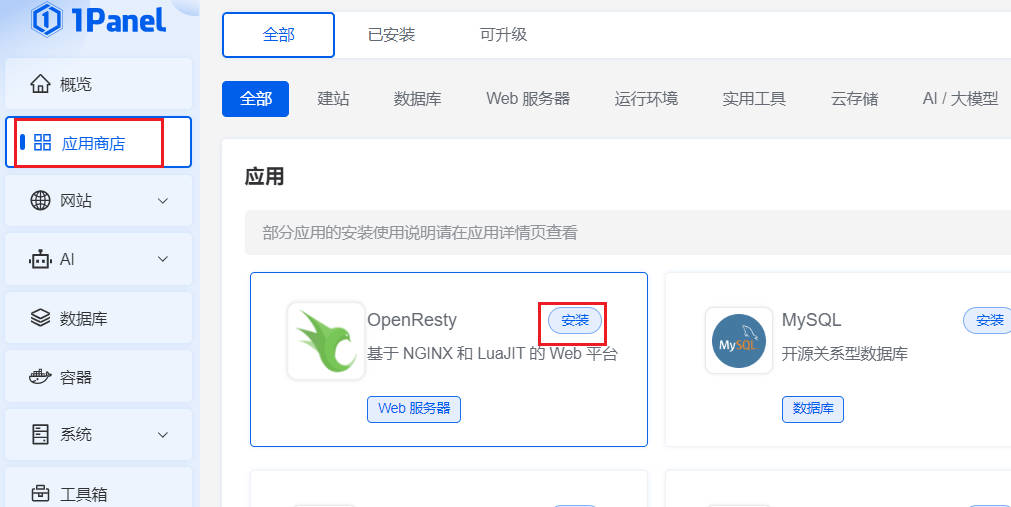
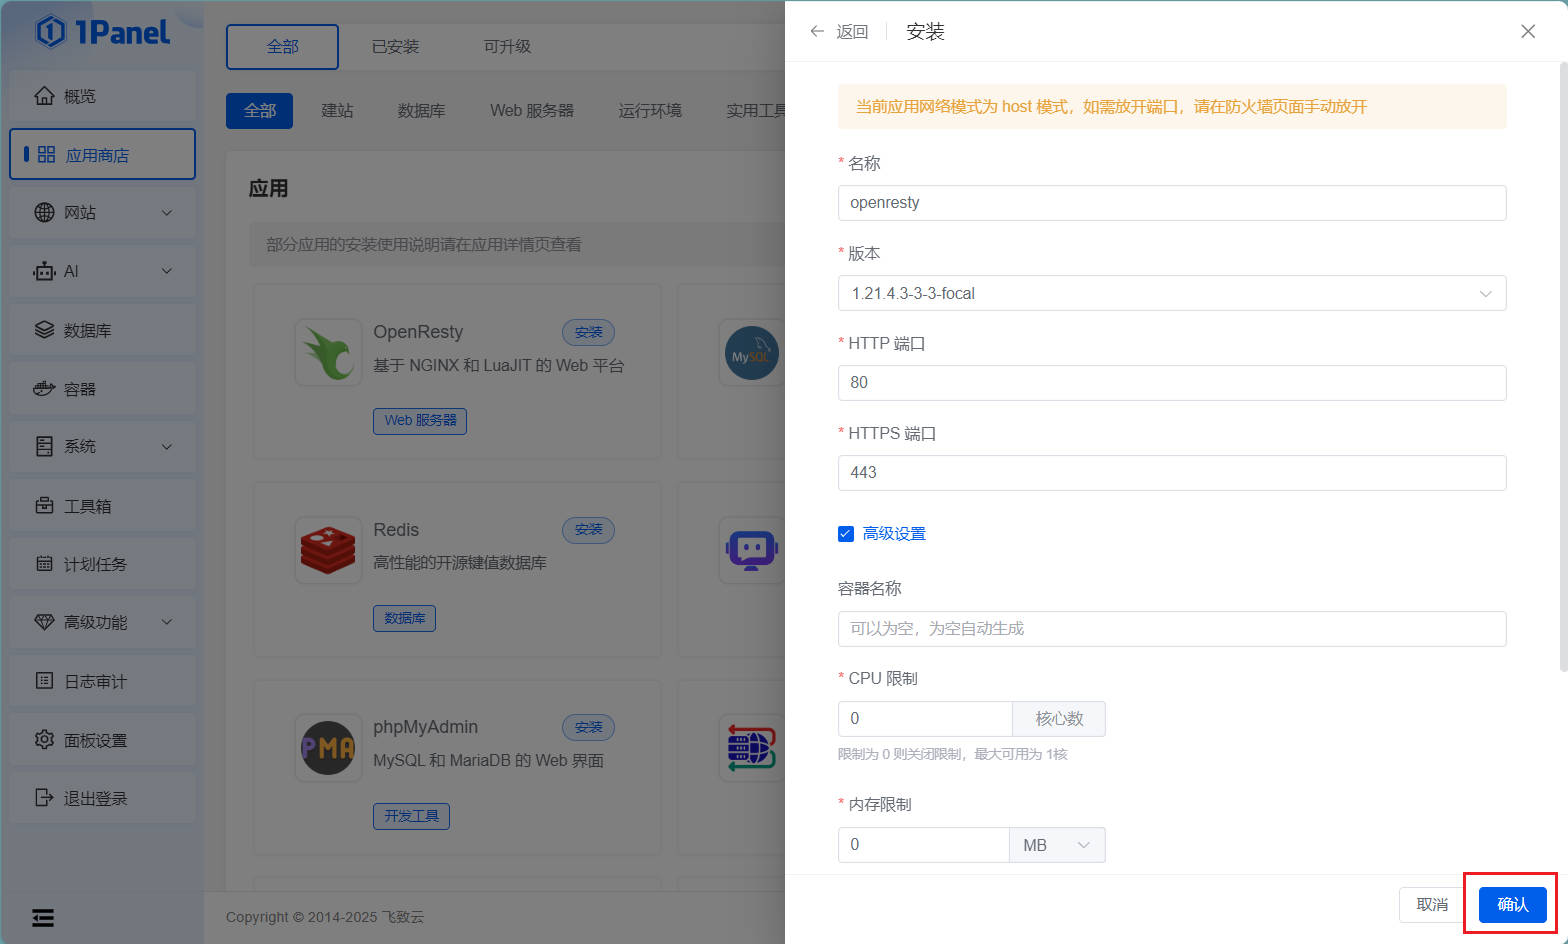
(4) Login to the 1Panel panel and install OpenResty.
Click Confirm and wait for the installation to complete…
4.3.2 Install SSH
(1) Open a terminal and update the software source
sudo apt update
(2) Install OpenSSH Server
sudo apt install openssh-server
(3) Check the SSH status (to make sure the SSH service is running)
sudo systemctl status ssh
(4) Start SSH
sudo systemctl enable ssh
(5) Set up a bootloader
sudo systemctl enable ssh
Other commands
# Restart the service (used after modifying the configuration)
sudo systemctl restart ssh
4.3.3 Installing Git
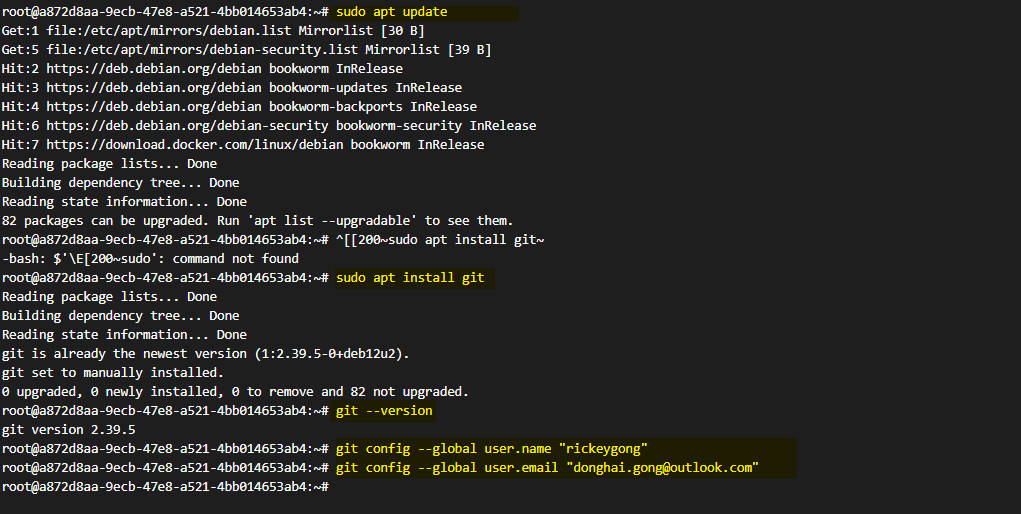
(1) Update the package index
sudo apt update
(2) Install Git
sudo apt install git
(3) Verify the installation
git --version
(4) Configure Git (username, email)
git config --global user.name "yourName"
git config --global user.email "yourEmail@example.com"
4.3.4 Install Hugo
(1)Install
wget https://github.com/gohugoio/hugo/releases/download/v0.145.0/hugo_extended_0.145.0_Linux-64bit.tar.gz
(2)Decompression (in digital technology)
tar -xzf hugo_extended_0.145.0_Linux-64bit.tar.gz
(3)Installation to the system path
sudo mv hugo /usr/local/bin/
(4)Verify that the installation was successful
hugo version

4.3.5 Github key pairs
Refer to 4.2.3 to configure the key pair.
Tip: If you are a root account, the path to the generated key pair is usually /root/.ssh.
4.4 vscode SSH login
What you are doing here is to use a key pair to log in securely.
4.4.1 Local computer
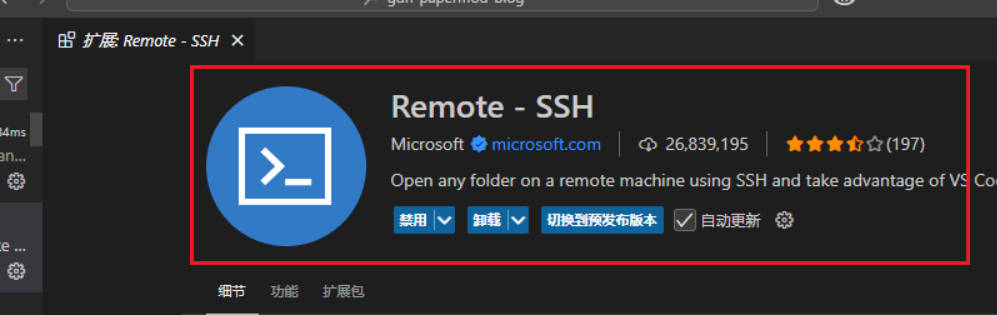
(1)vscode install remote ssh extension
(2)PowerShell Generating Key Pairs
ssh-keygen -t rsa -b 4096 -C "my_hugo_papermod_blog"
Description:
- -t rsa: indicates that the RSA algorithm is used.
- -b 4096: the length of the key is 4096 bits.
- -C: you can fill in the comment to identify the key.
You will be prompted to enter the save path:
Enter file in which to save the key (/home/youruser/.ssh/id_rsa):
Enter directly to use the default path (it is recommended to use the default)
You will then be prompted to set the key passphrase (which can be left empty for easy, secret-free login)
Enter passphrase (empty for no passphrase):
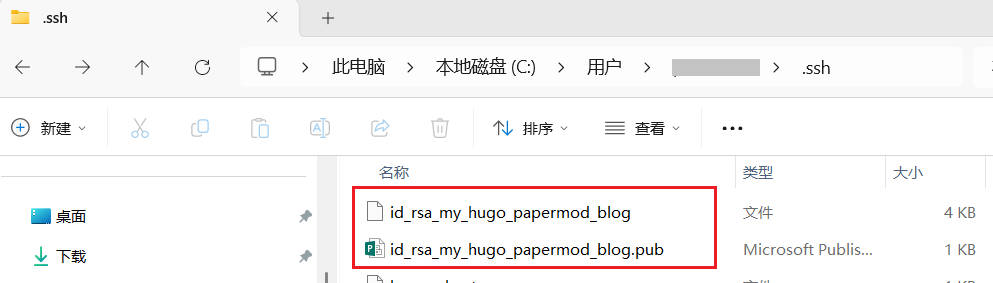
(3)Generated documents
| File | Description |
|---|---|
| ~/.ssh/id_rsa | Private key. Don’t give it away. |
| ~/.ssh/id_rsa.pub | Public keys, which can be distributed to remote servers |
(It is recommended to change the filename, as there may be other applications where you will generate key pairs later to avoid confusion)
4.4.2 Server
Upload the public key:
(1)Go to /root/.ssh and create a new authorised_keys file.
(2)Open the authorised_keys file, copy and paste the public key into it, and save it.
Note:
- If there is no
authorized_keysfile, you need to create it manually, and then copy and paste the public key generated by your local computer into it. - If there is an
authorized_keysfile, copy and paste the public key generated by your local computer, that is, append the public key.
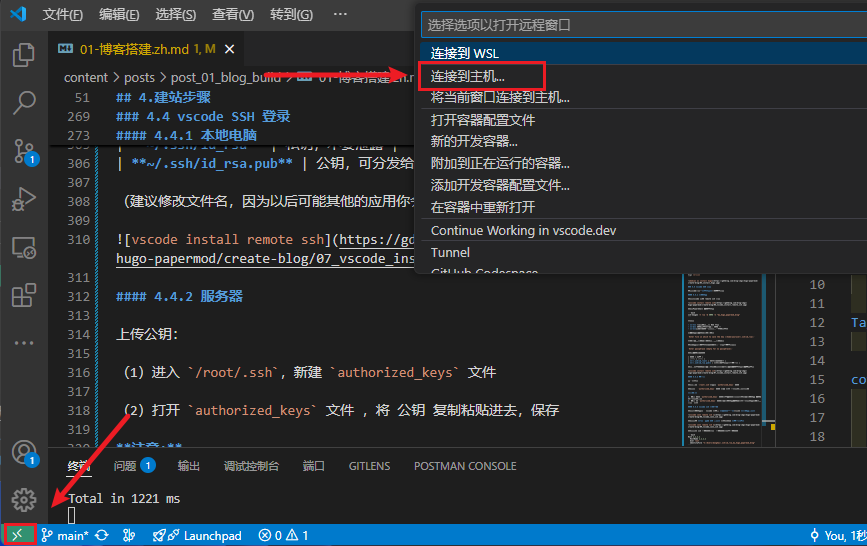
4.4.3 vscode ssh connection test
(1)Open vscode on the local computer, click on the lower left icon, select Connect to Host, and click on the Connect to Host icon**.
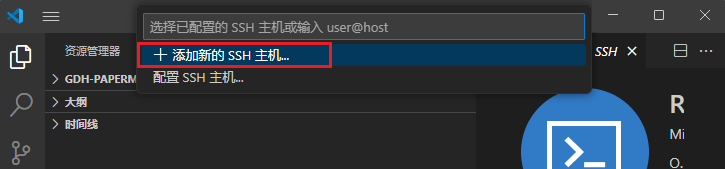
(2)Option +Add new SSH host, then enter Server IP !
(3)Select the ssh configuration file, open the configuration file, and modify the configuration file
Host 1.1.1.1
  HostName 1.1.1.1
  User root
  IdentityFile "C:/Users/donghai/.ssh/id_rsa_my_hugo_papermod_blog"
Host,HostName: replace it with your own IP.IdentityFile: fill in the path of the private key.
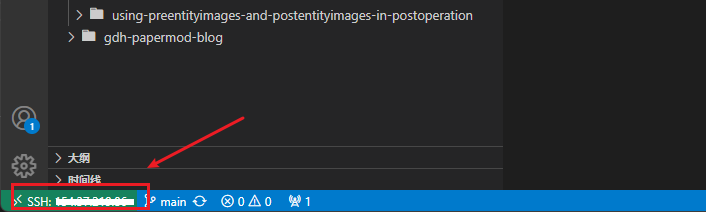
(4)Click the icon in the lower left corner of ****, select Connect to Host, select the host you just added
If xxx fingerprints appears, select [Yes] then
If everything goes well, the icon in the lower left corner will show the IP address of the host you are currently connected to.
5. Building a website
5.1 Github Private Position Building
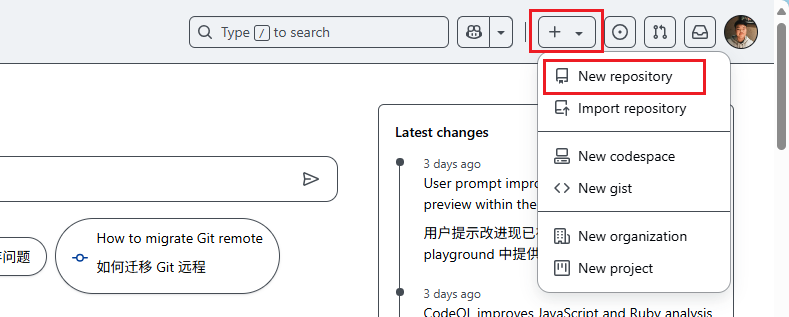
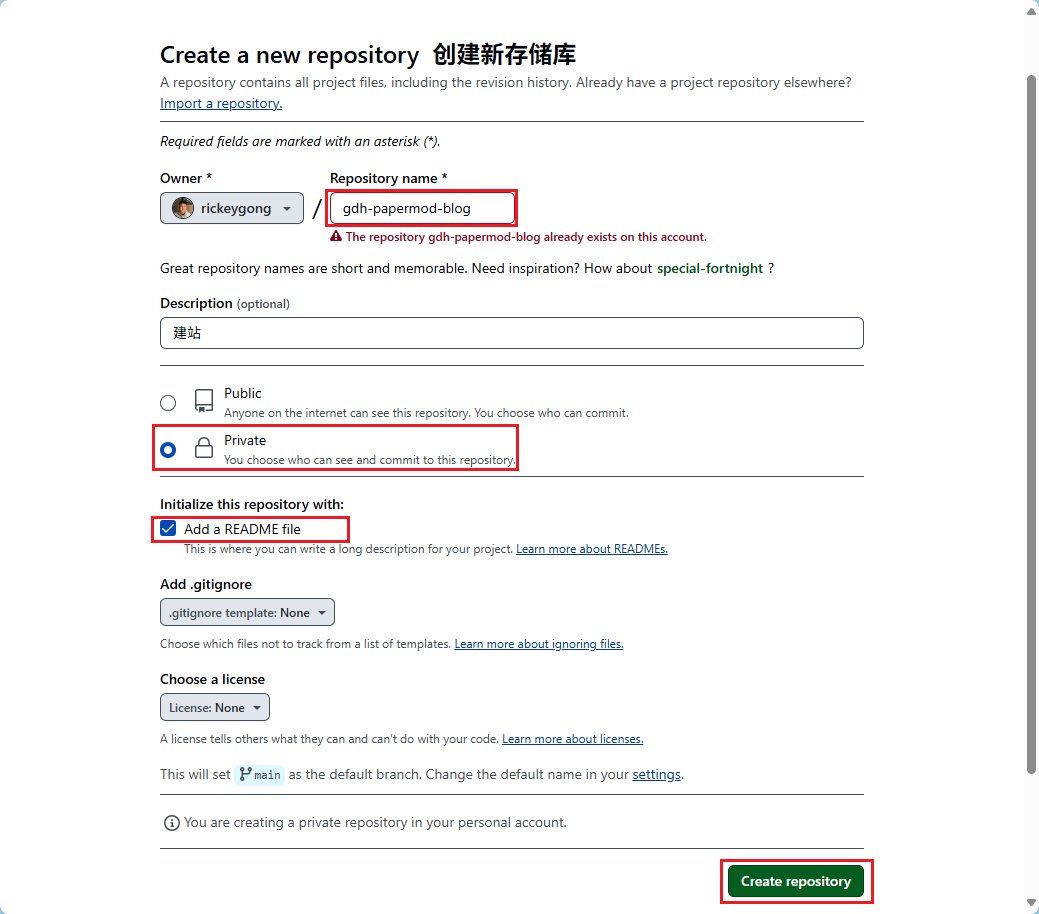
(1)Log in to Github, and create a private bin.
(2)Fill in the name of the repository, tick private, tick the README.md file, and finally click Create repository.
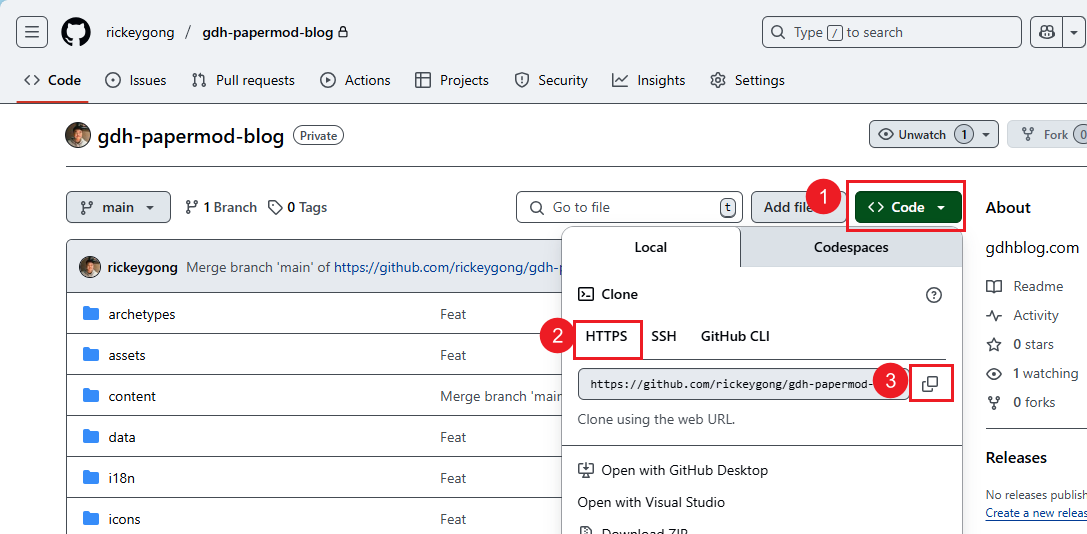
(3)Clone to local computer
In D drive directory, run ‘Terminal’ to clone the project (in other drive is also OK, depends on your needs)
# Fill in your own warehouse address
git clone https://github.com/rickeygong/gdh-papermod-blog.git
REP Url:
5.2 Hugo new site
(1)In the D drive directory, run ‘Terminal’ and enter the following command to create a blog
# gdh-papermod-blog --> Write your own warehouse name
hugo new site gdh-papermod-blog
(2)Refer to hugo-PaperMod installation document for installation (very detailed)
(3) Once the blog is ready, submit it to the GitHub repository
git add .
git commit -m "Feat: Blog build"
git push origin main
5.3 Adding a blog to the server
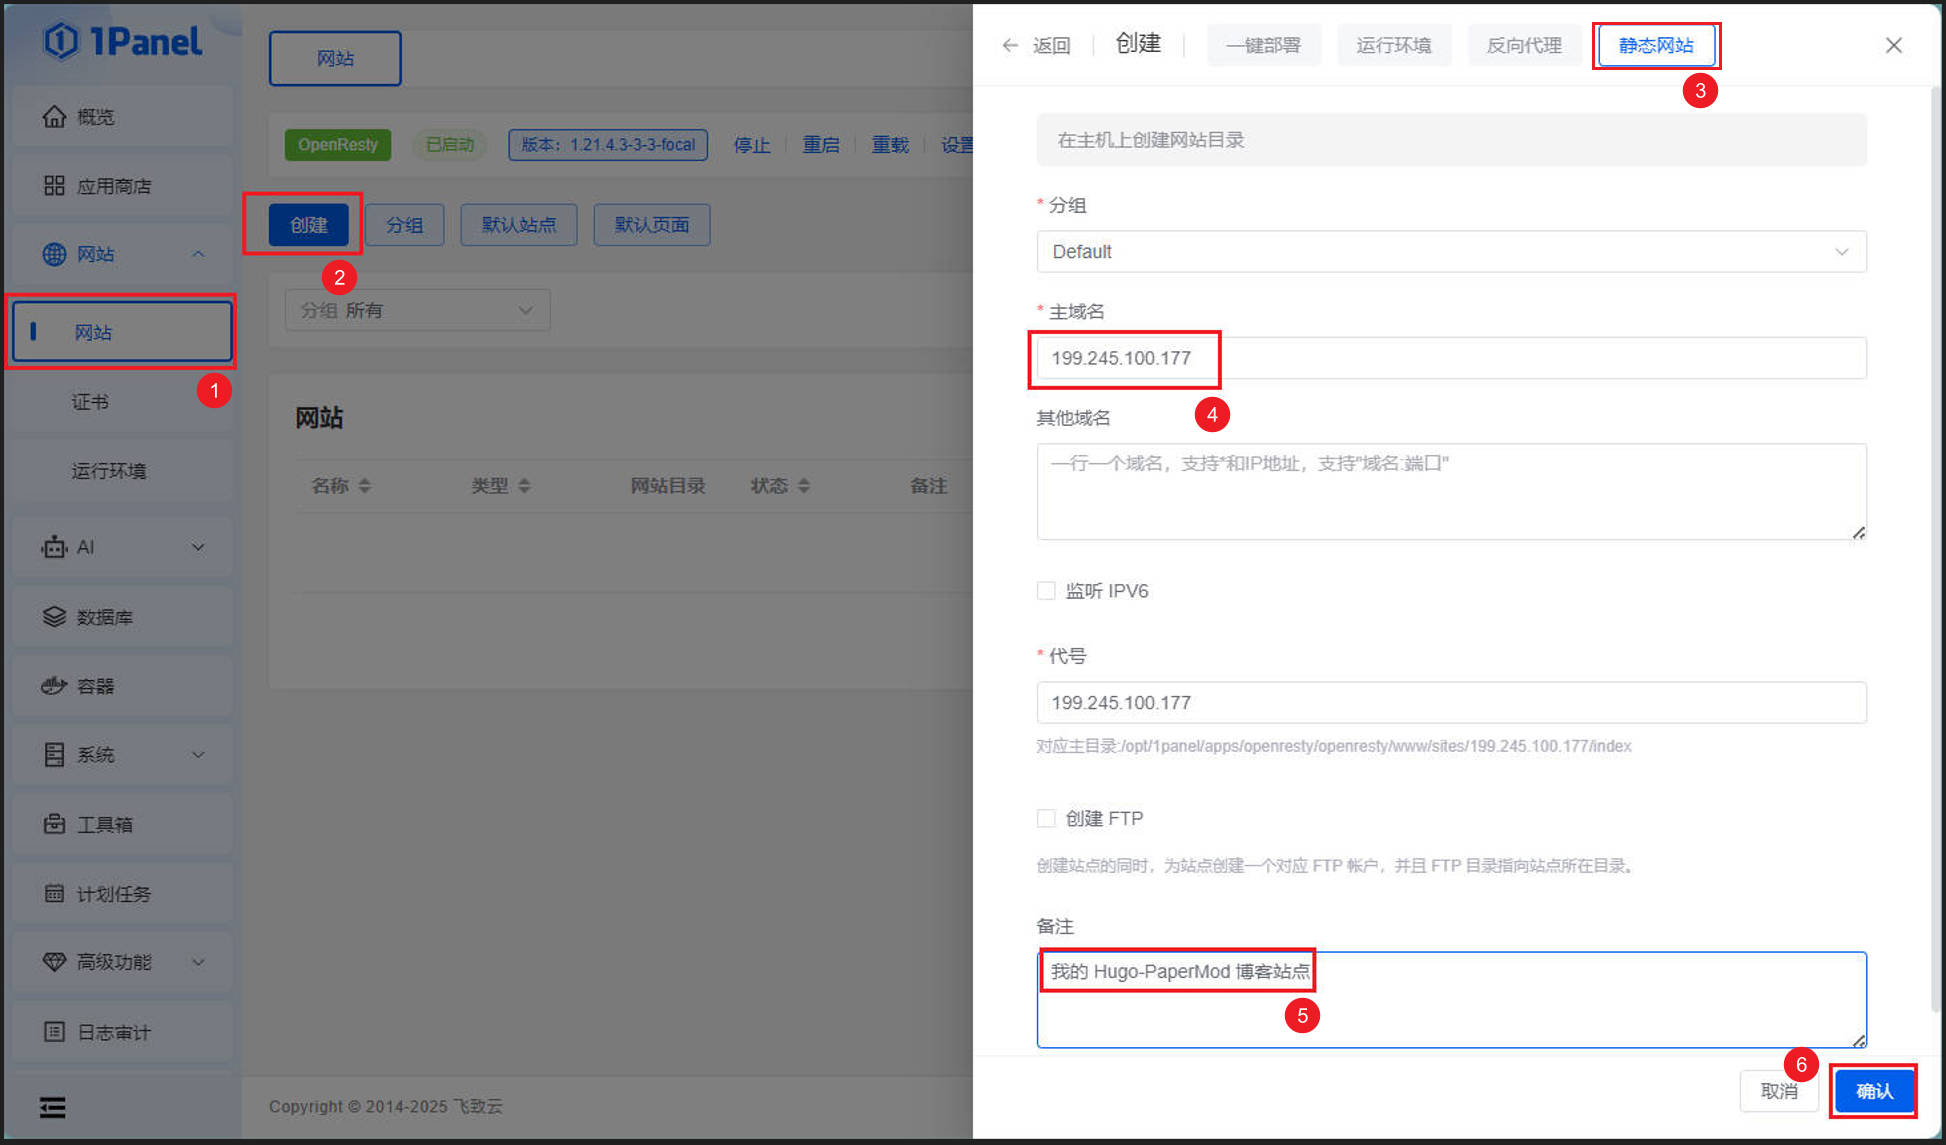
(1) Login to 1Panel panel –> Click Website in the menu bar –> Click Create –> Select Static Website –> Fill in Primary Domain Name (domain name if you have domain name, IP if you don’t have domain name) –> Fill in Description (as needed) –> Click Confirm.
(2)Open website directory –> delete all files in the directory (normally there are only 2 files: 404.html and index.html)
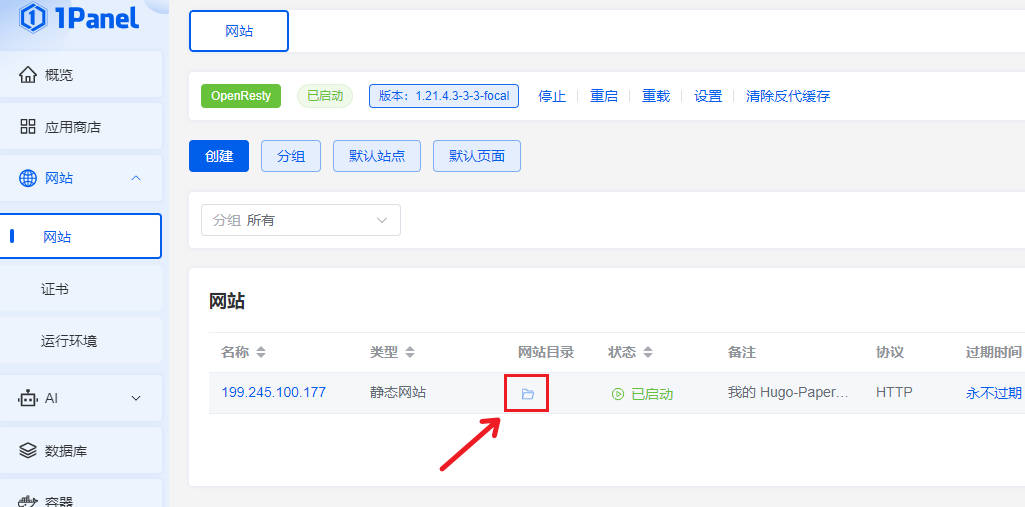
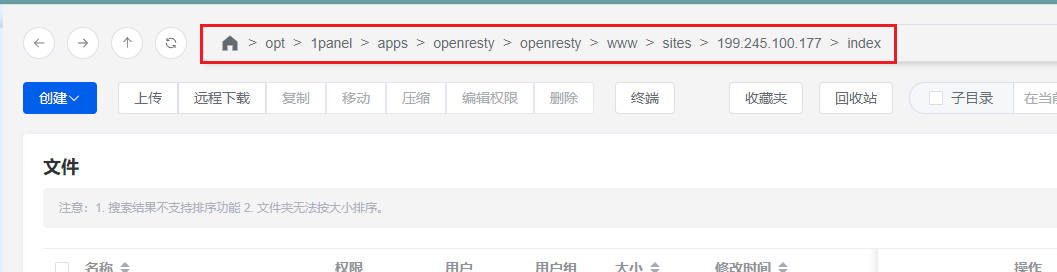
Record the path, we will clone the blog to this path later.
My site path is /opt/1panel/apps/openresty/openresty/www/sites/199.245.100.177/index
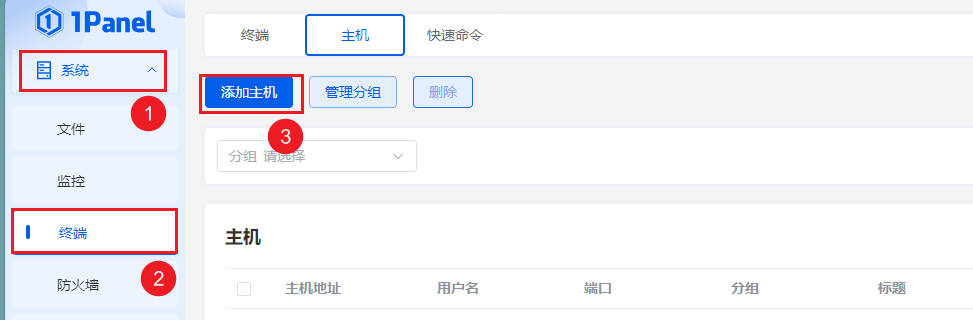
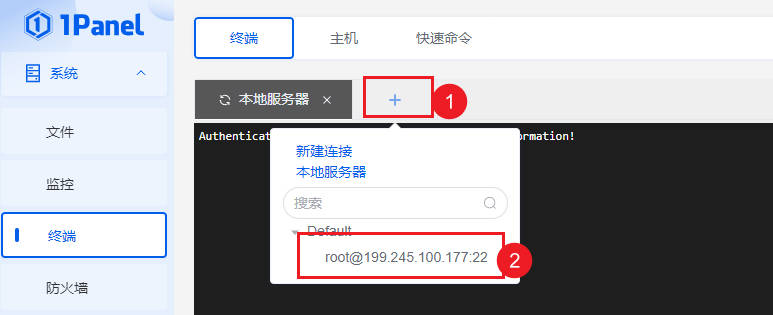
(3)Set the host, fill in the IP and root password –> Click Connect Test –> Click Confirm.
(4)Open Terminal
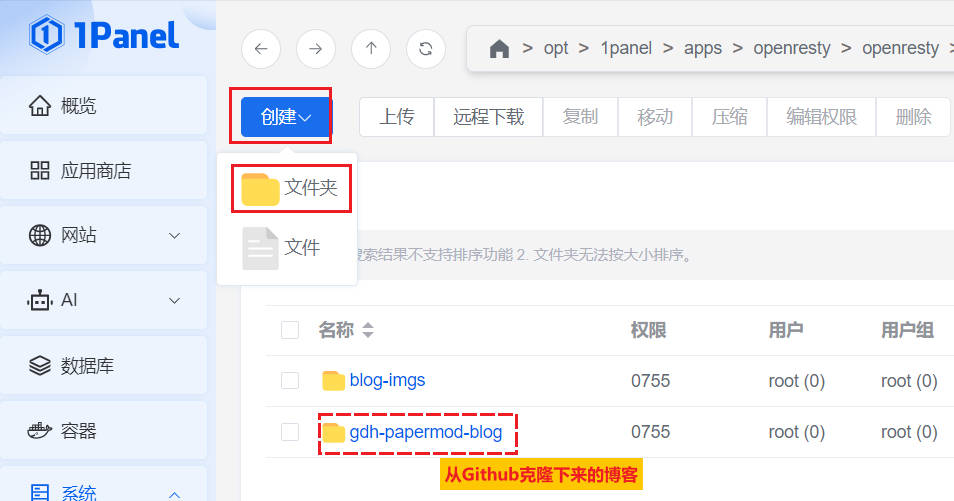
(5)Enter the site path –> Enter the command to clone the blog project (5.2 has been uploaded to Github)
# Access to the site path
cd /opt/1panel/apps/openresty/openresty/www/sites/199.245.100.177/index

# Clone the project (replace with your own project clone address)
git clone https://github.com/rickeygong/gdh-papermod-blog.git
(6)Add a new blog-imgs folder to store images used in blog posts.
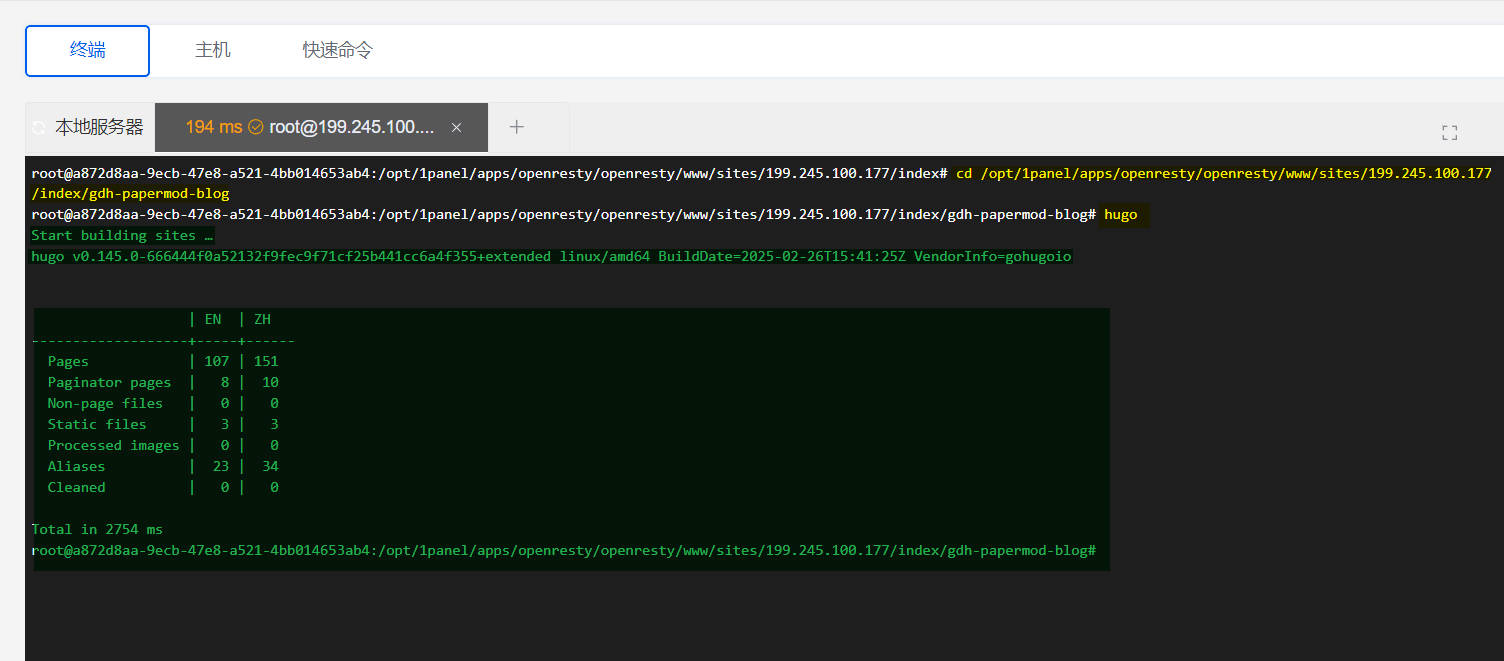
(7)Compile the blog: generate public file, open terminal –> go to blog project –> type hugo.
# Enter the blog project
cd /opt/1panel/apps/openresty/openresty/www/sites/199.245.100.177/index/gdh-papermod-blog

# Enter `hugo`
hugo
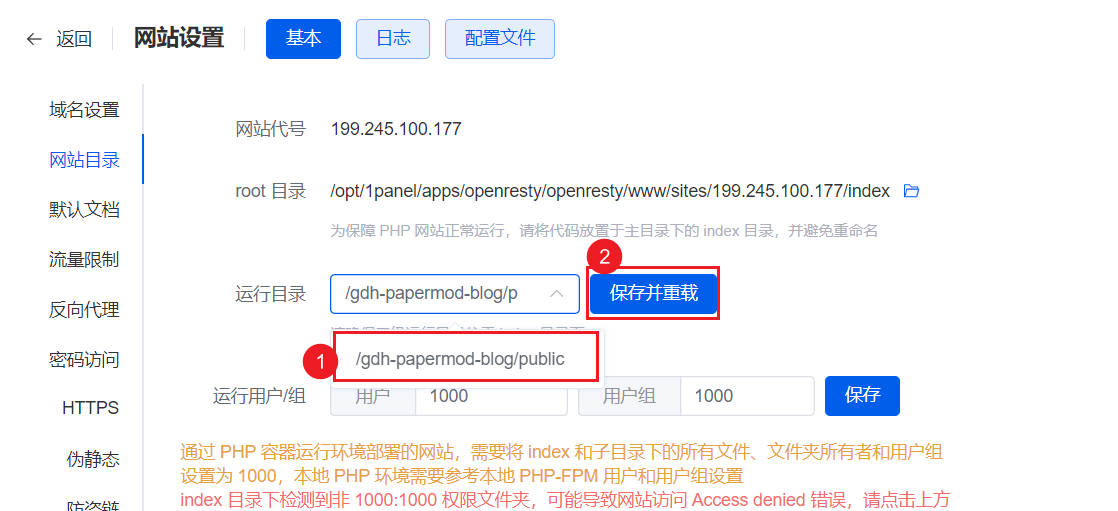
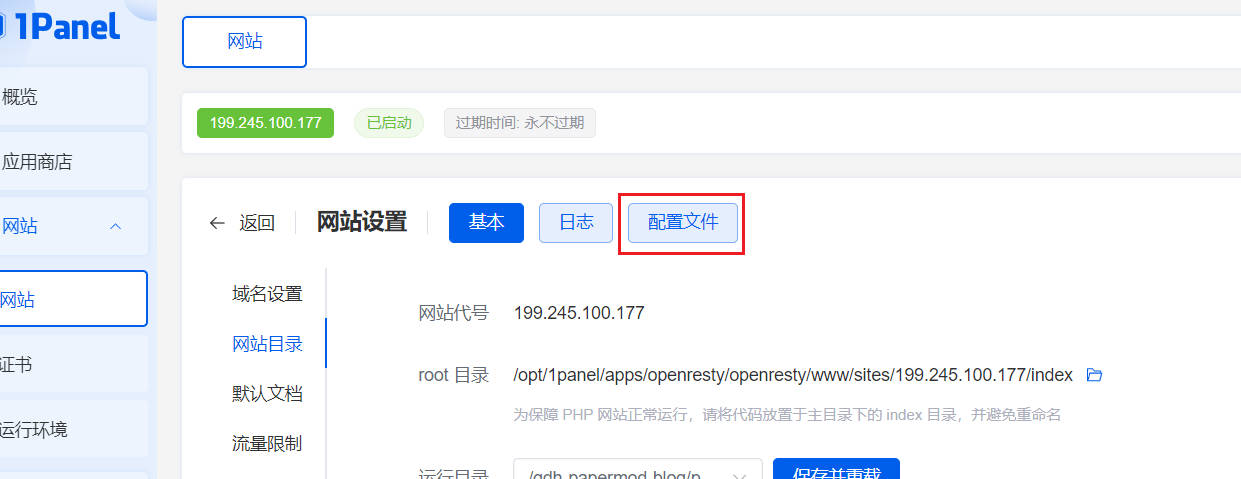
(8)Configure the Web Directory path (important)
Click on Configuration

Select gdh-papermod-blog/public in the run directory –> click Save Reload.
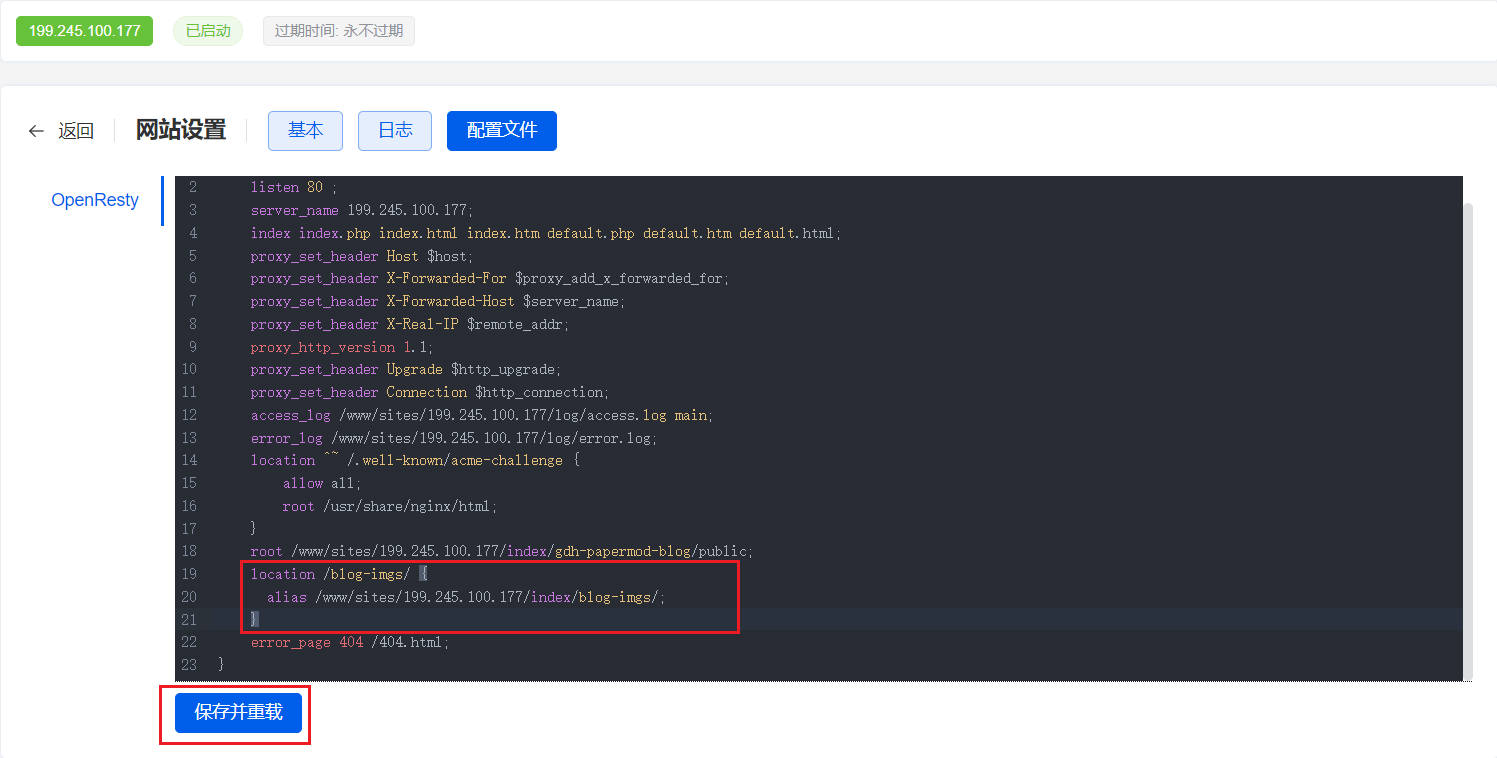
(9) Configure ‘blog-imgs’ mapping (important)
Because the server only exposes the public folder, and the blog-imgs folder is listed alongside public, the server can’t find blog-imgs at all when accessing it, resulting in a 404, so we need to change the server configuration to map it separately.
- Click Website.
- In the Actions column, click Configuration. 3.
- Click Configuration Files.
- In the server configuration block, add
location /blog-imgs/after the root line.
root /www/sites/199.245.100.177/index/gdh-papermod-blog/public;
location /blog-imgs/ {
  alias /www/sites/199.245.100.177/index/blog-imgs/;
}
error_page 404 /404.html;
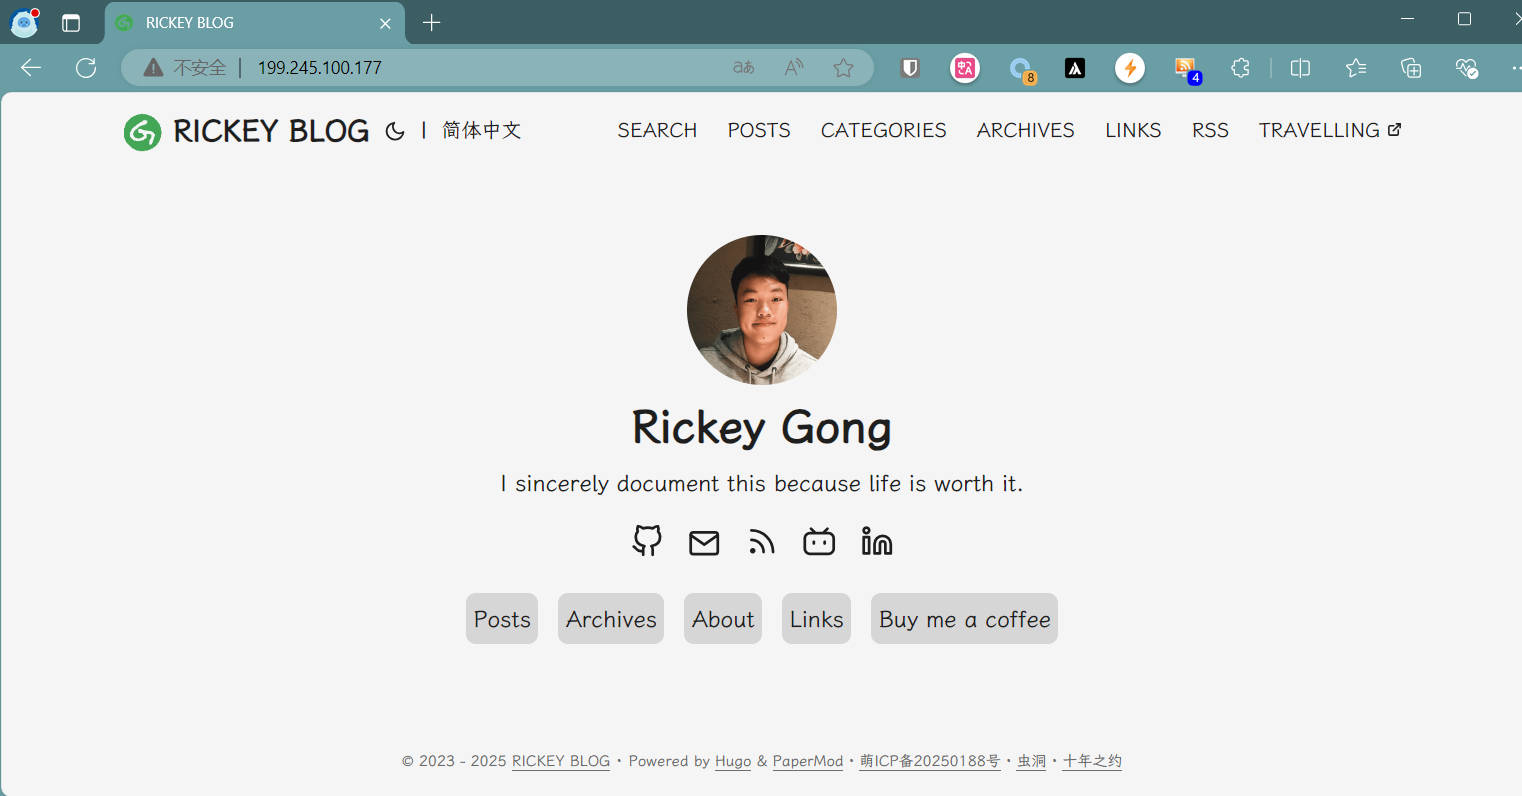
6.Access
If all goes well, visit the set address in your browser and you will see your blog!
7.About Optimisation/Adjustment
For space reasons, I’ll start a separate post to document each optimisation/adjustment or blog tweak going forward, so please refer to it:
| No. | Optimisation/Adjustment | Url |
|---|---|---|
| 1 | Add Page, Multi-Language, Table Styles, etc. | View |
| 2 | Add Links Page | View |
| 3 | Catalogue hover on the left | View |
| 4 | Add document info at bottom of article | View |
| 5 | Set external links to open in new tab | View |
| 6 | Add related articles at bottom of article | View |
| 7 | Add Giscus Review | View |
| 8 | Add Garlic Records site and article views | View |
8. Conclusion
If you have encountered problems in the deployment process do not know how to solve (provided that you have thought about),
you can contact me by e-mail or WeChat, build a station, figure a fun, make a friend, help each other!
Thank you for your patience in reading! Come pick an emoji or leave a comment!